How to Compress Airtable Attachments With ShortPixel
Use a custom Airtable extension to compress your Airtable attachments with ShortPixel with a click of a button.
I'm going to show you how to compress your Airtable attachments with ShortPixel...
WITHOUT using integration services like Zapier, n8n, or other paid tools.
Here's how this will work:
- You have an attachments field with one or more attachments
- We'll create a custom Airtable extension (copy and paste for the most part)
- We'll run the extension and it'll gather your attachments, send them to ShortPixel, and save them to Airtable
This solution is especially great if you are reaching the storage limits on Airtable and need to cut down on file size!
Costs Associated With This
ShortPixel comes with 100 free compressions per month through the API.
However, signing up with this link will get you an extra 100 free optimizations. Anything more than that is pretty cheap.
As for Airtable, you need to be on any paid tier to create custom extensions (booo Airtable! Bring back free extensions!).
Steps to Compress Airtable Attachments With ShortPixel
Here's the high level process we'll follow:
- Create an Airtable Extension
- Modify it to work with your unique fields
- Compress!
Create The Airtable Extension
Head over to your paid Airtable account, go to the base and table you want to compress images on, and add a new extension.
Select "Scripting".
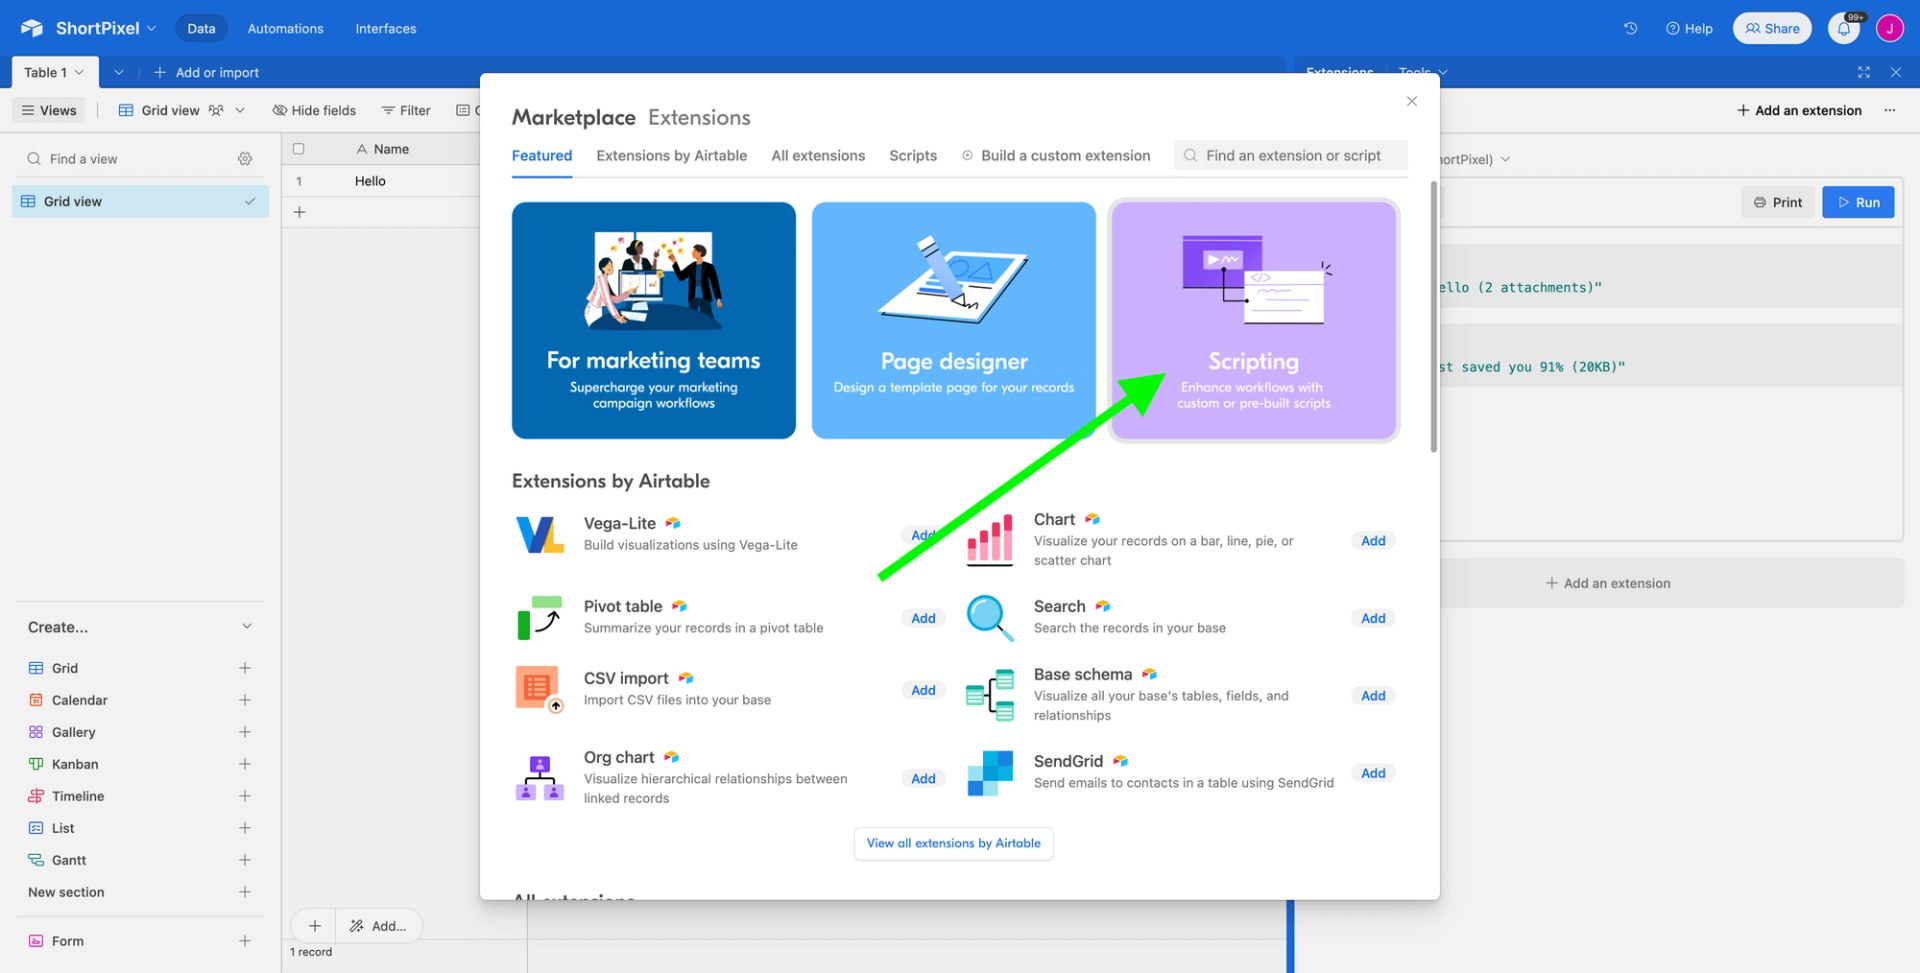
Then paste in the following code:
// Configuration.
const shortPixelApiKey = 'xxxxxxxxxxxxxxxx';
const airtableAttachmentSource = 'Attachment';
const airtableAttachmentDestination = 'Attachment 2';
const airtableColumnToLog = 'Name';

// Script.
const table = base.getTable(cursor.activeTableId);
const view = table.getView(cursor.activeViewId);
const queryResult = await view.selectRecordsAsync();

for (let record of queryResult.records) {
  let attachments = record.getCellValue(airtableAttachmentSource);
  attachments = attachments.map(attachment => attachment.url);

  console.log(`Compressing ${record.getCellValue(airtableColumnToLog)} (${attachments.length} attachments)`);

  let request = await remoteFetchAsync('https://api.shortpixel.com/v2/reducer.php', {
    body: JSON.stringify({
      'key': shortPixelApiKey,
      'plugin_version': 'JS123',
      'lossy': 1,
      'resize': 0,
      'cmyk2rgb': 1,
      'refresh': 0,
      'urllist': attachments
    }),
    method: 'POST'
  })

  const json = await request.json();

  if (json) {
    let urlsToAdd = [];
    let totalUploaded = 0;
    let totalDownloaded = 0;

    json.forEach(response => {
      if (response.Status.Code == 2) {
        urlsToAdd.push({ url: response.LossyURL });
        totalUploaded += response.OriginalSize;
        totalDownloaded += response.LossySize;
      }
    });

    let percentReduced = Math.round((totalUploaded - totalDownloaded) / totalUploaded * 100);
    let kbReduced = Math.round((totalUploaded - totalDownloaded) / 1024);

    console.log(`ShortPixel just saved you ${percentReduced}% (${kbReduced}KB)`);

    await table.updateRecordAsync(record.id, {
      [airtableAttachmentDestination]: urlsToAdd,
    })
  }
}
Modify The Extension to Use Your Info
At the top of the script, there is some info you need to change.
First, add your API key where I have x's.
You get your API key by logging into your ShortPixel dashboard.
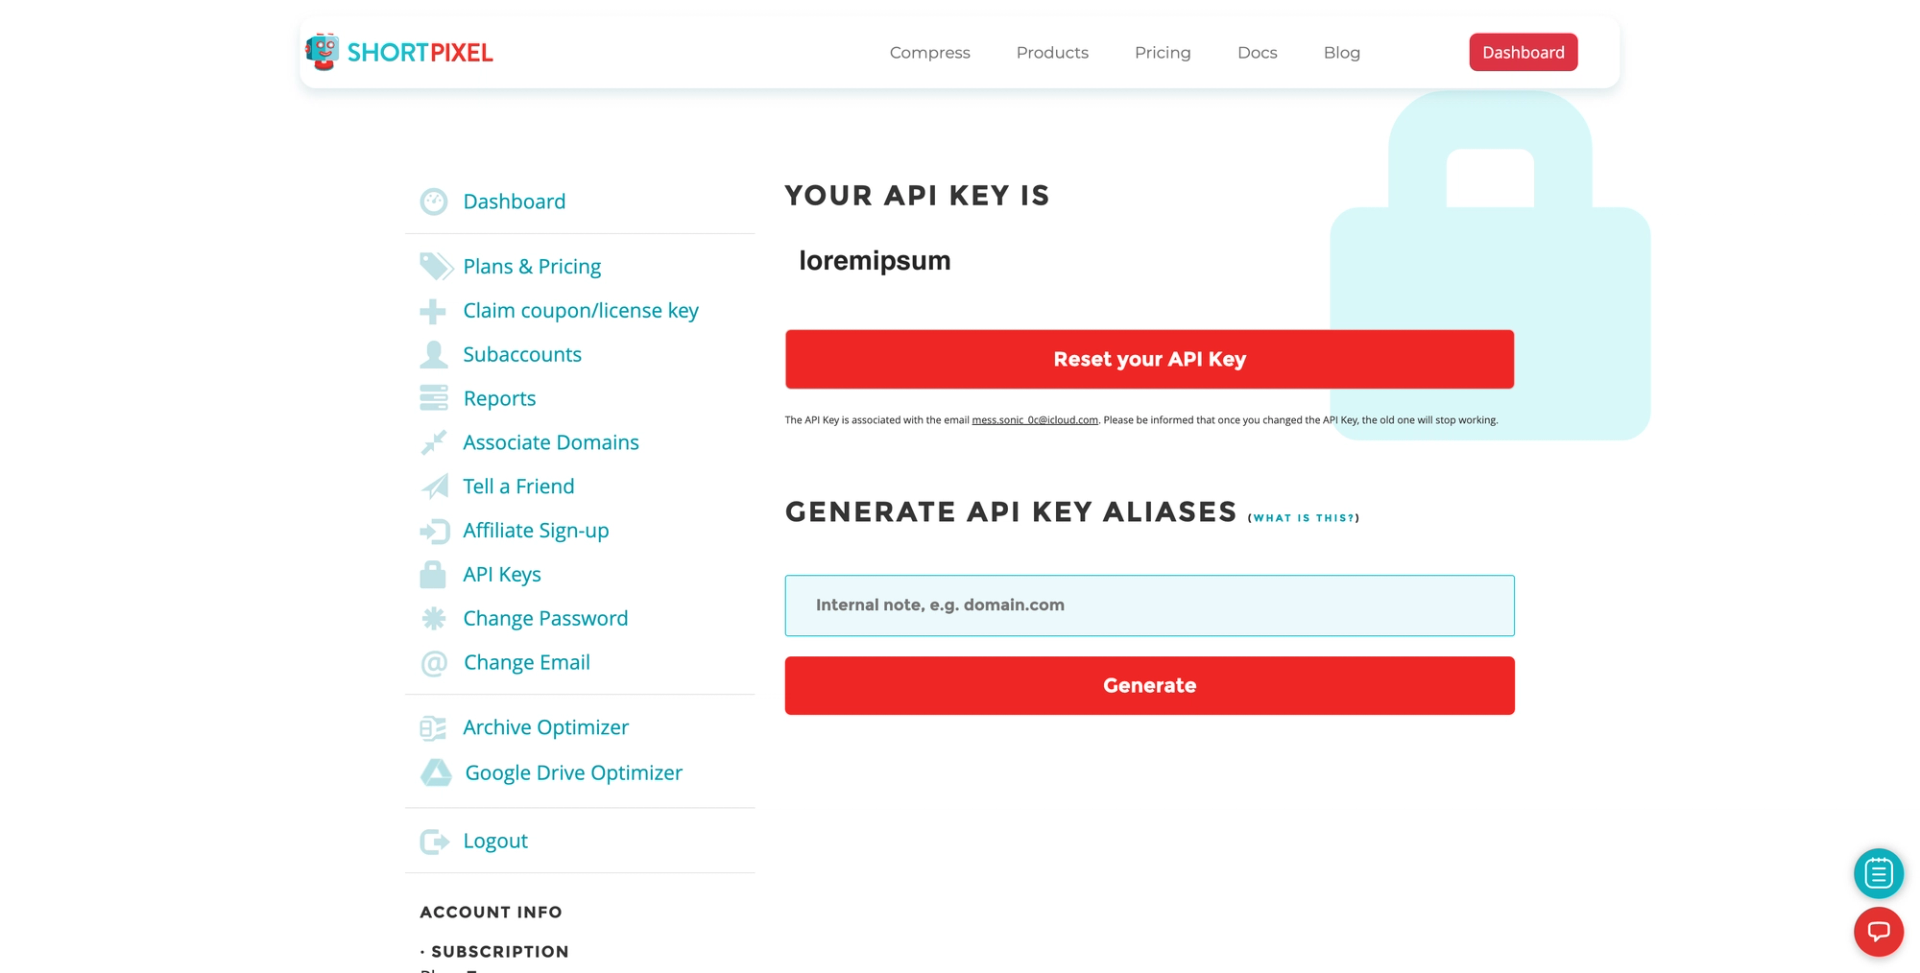
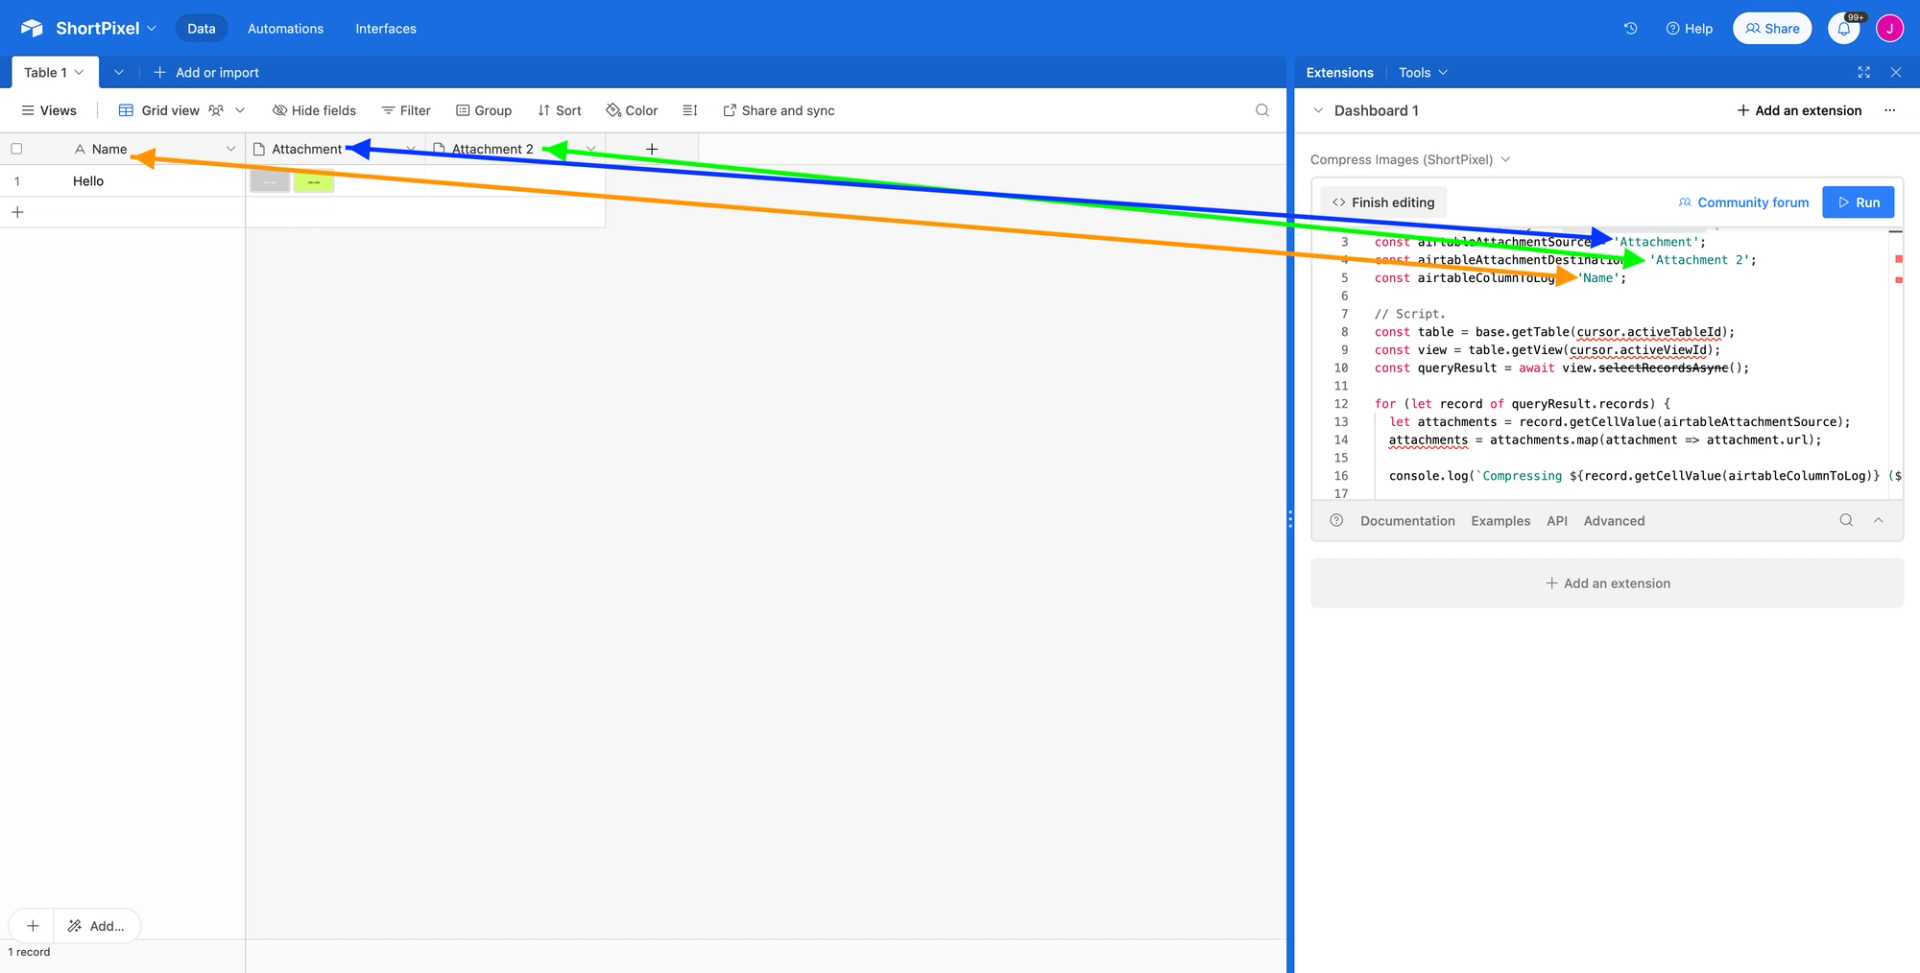
Next, change the following three values to match your Airtable fields:
- airtableAttachmentSource – this is the field that contains your attachments. Mine is simply named "Attachments".
- airtableAttachmentDestination – this is where you want the compressed images to go. I put mine in a new field to test things out, but you can make it the same field as the source so it just replaces the original ones.
- airtableColumnToLog – set this to whatever field you want to show up in the logs so as the compression script is running it'll say "Compressing XYZ". It's especially useful if you have a lot of rows and want to know which row it's working on and when it'll be done.
Here's what mine looks like:
Back Up and Click Run!
Backup first. You never know what's going to happen.
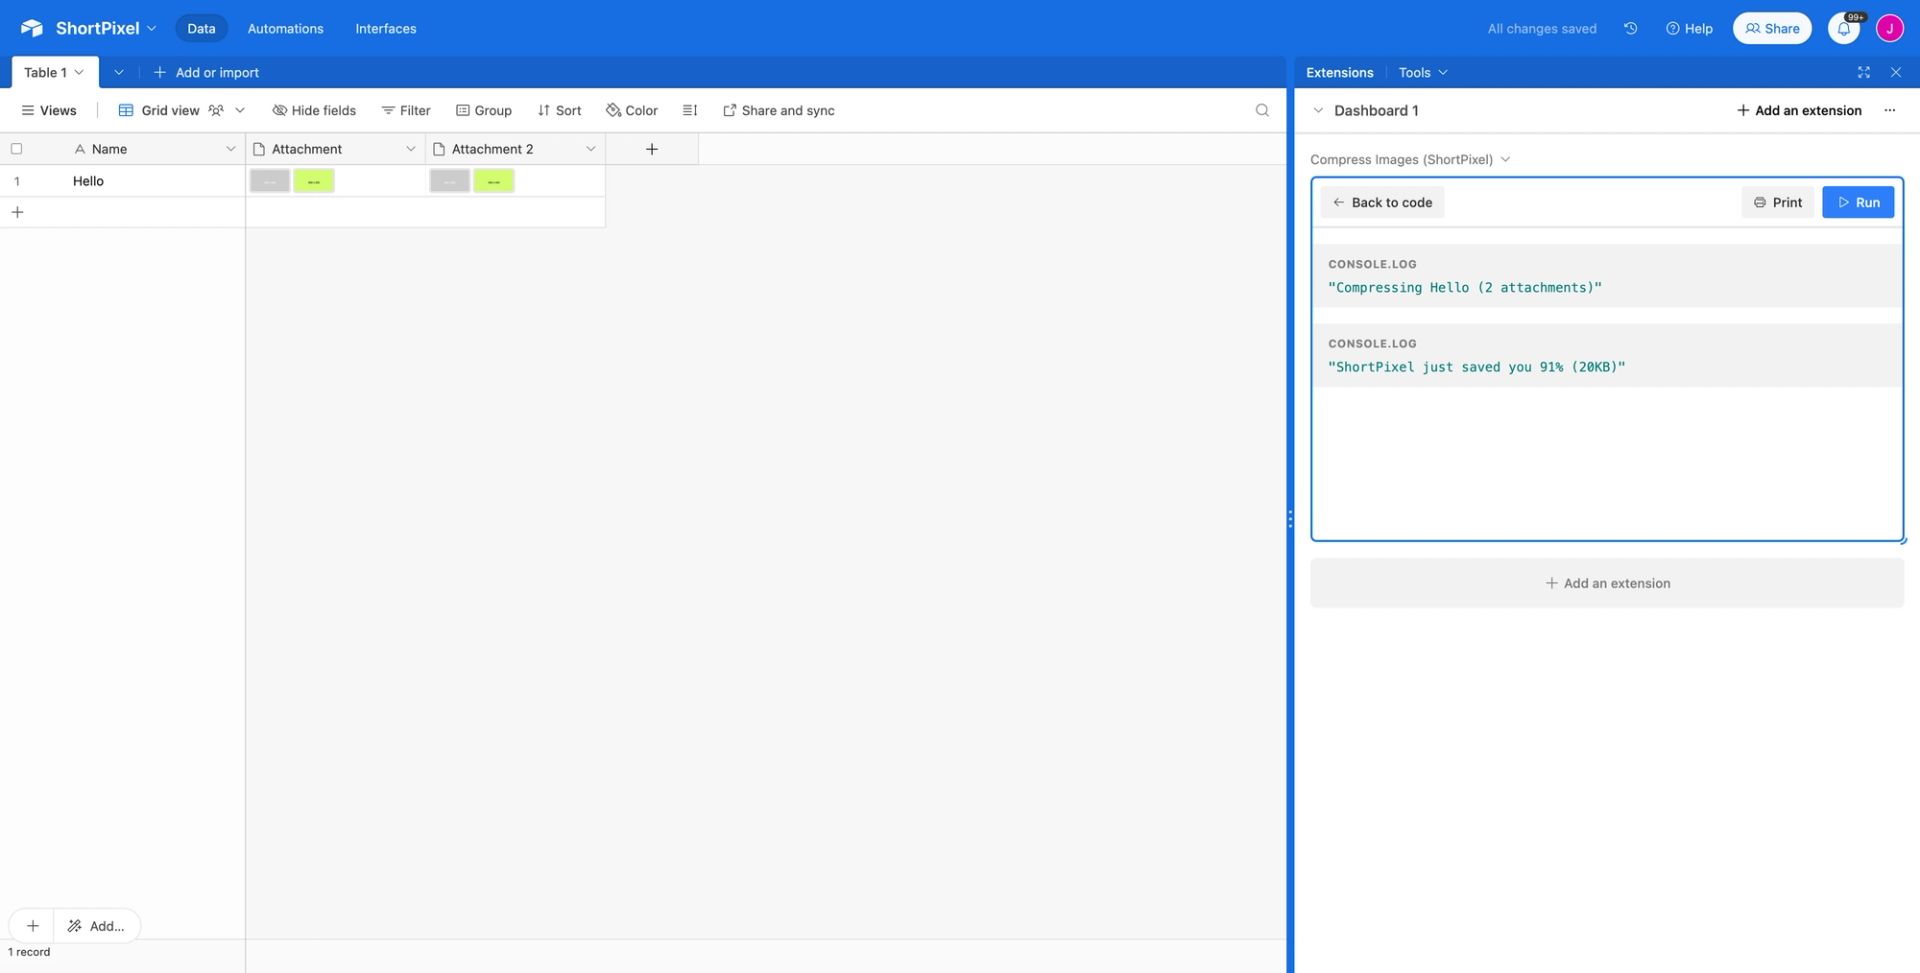
Then click run and watch it compress your images and let you know how much you saved!
Advanced Configuration
You can modify the script if you know how to use ChatGPT and/or are familiar with JavaScript.
ShortPixel's API has additional configuration options that let you do things like resize images and convert them to different formats like WebP.
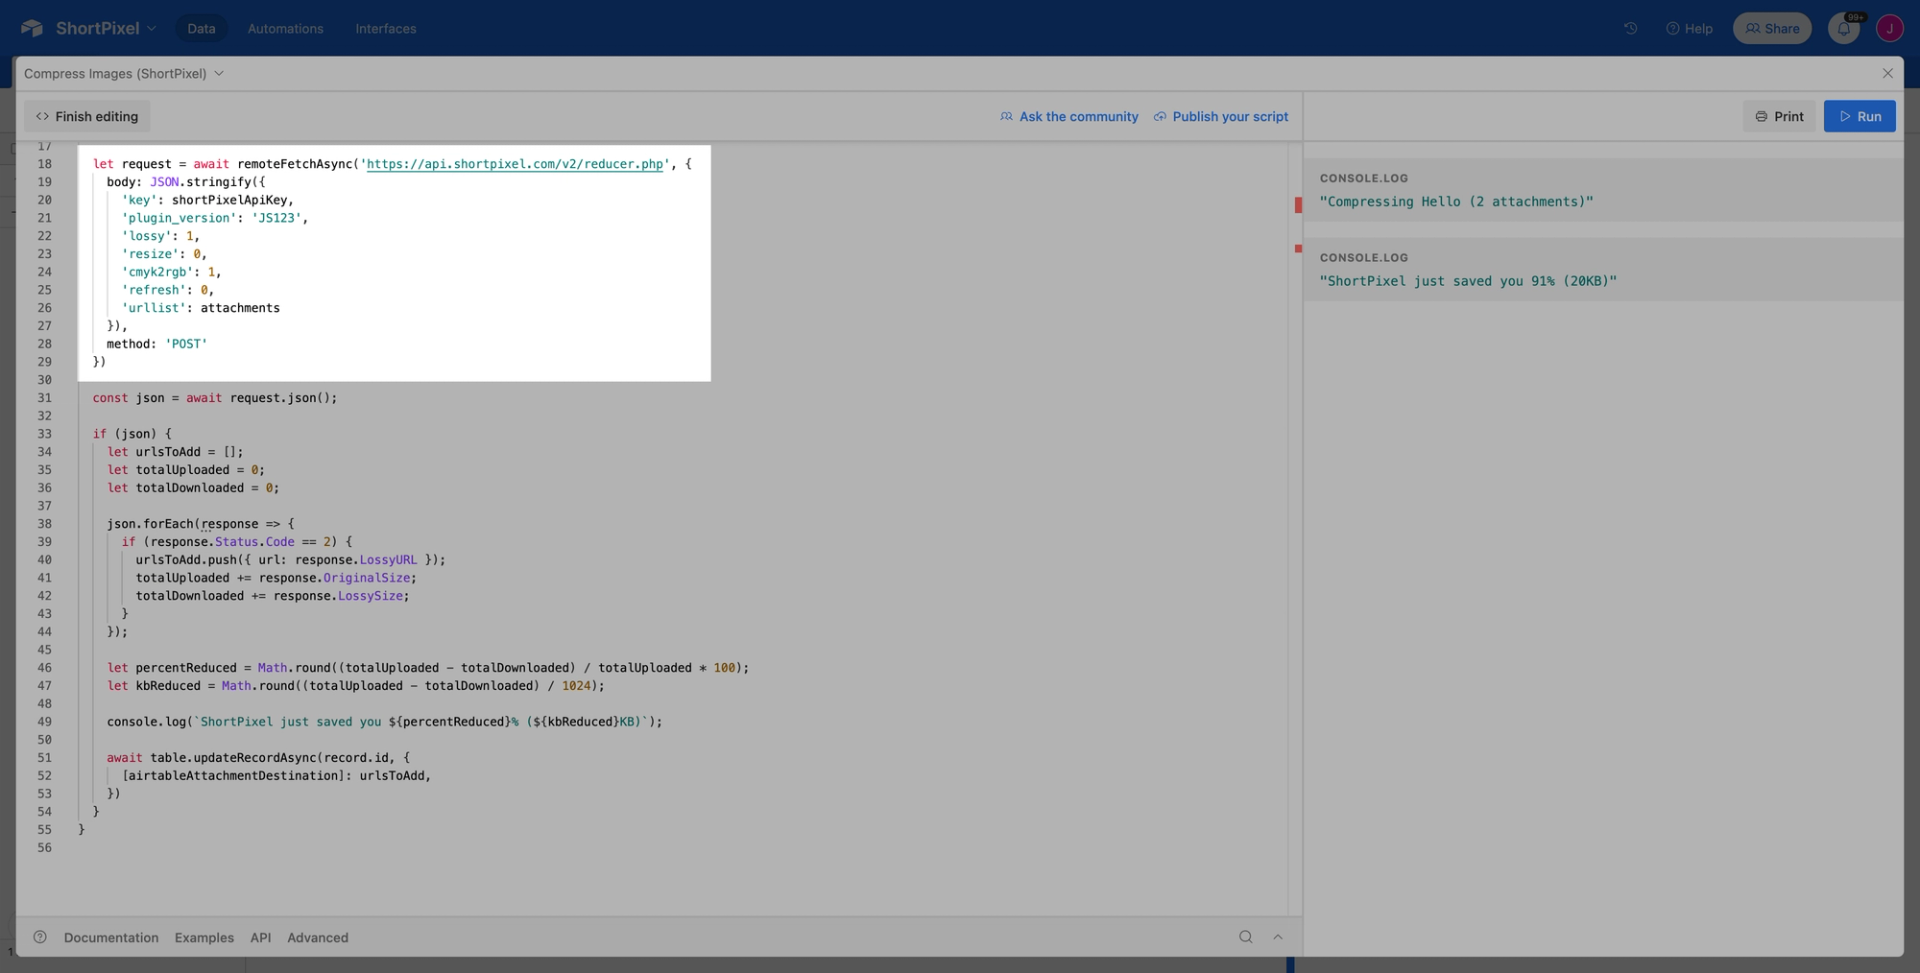
You can take these actions by modifying the request to the ShortPixel API highlighted below.
Final Thoughts
Gotta love saving some cash by directly integrating ShortPixel to Airtable.
We cut out the middleman (Zapier) and in doing so saved money and compress faster!
Hope you got it to work!