How to Serve a Subdomain as a Subdirectory (Using Cloudflare)
Using a subdirectory on an established domain is almost always better for SEO than using a subdomain. But what happens when you have two applications you want available on the same domain? This tutorial will show you how easy it is to serve two different websites on one domain.
You're probably an SEO-conscious person who wants the best of both worlds. That is to use two different platforms on the same domain without using a subdomain.
In this tutorial, I'll show you how to serve your subdomain as a subdirectory using Cloudflare Workers (aka a reverse proxy).
But first, let me take a stab at putting the subdomain vs subdirectory debate to rest.
Subdomain vs. Subdirectory
But, wait! Google says using a subdomain doesn't impact SEO!?
It's true they said that, but anything Google says has to be analyzed.
I believe the correct interpretation of Google's statement is as follows...
When considering a brand new domain, creating a subdomain will be given the same fair shot at achieving rankings as the root domain.
So it is true that subdomains and root domains have equal treatment.
But here's where this unravels.
If we are considering creating a brand new subdomain on a domain that has built up credibility and traffic over time, they will not be treated equally. The root domain has established its dominance, but the subdomain has not.
I'm not sure if the subdomain is treated as a fresh domain or if you're given some sort of boost because it's piggybacking off the root domain.
I do know that it won't perform as well as the primary domain.
The more backlinks your root domain has, the bigger impact serving your subdomain as a subdirectory will have on your site's traffic.
Here's a bunch of tweets showing significant growth after moving the subdomain to a subdirectory.

Using Cloudflare to Serve a Subdomain as a Subdirectory
Okay, we've established you want to use two different websites but not use a subdomain.
Lucky for you, it's pretty easy to serve your subdomain (e.g., blog.example.com) as a subdirectory (e.g., example.com/blog).
This trick I'm going to share with you is very cool and effective.
It requires you use Cloudflare and enable the proxy (orange clouds) on both your subdomain and root domain.
Here's a quick rundown of how this works
- We'll tell Cloudflare to run custom code on certain URLS (called routes in the Cloudflare dashboard).
- We'll add the custom code to a Cloudflare Worker (which are insanely powerful place to run code).
- The Cloudflare Worker will say "Okay, I see you are requesting the subdirectory. I'm going to request the subdomain behind the scenes and return the webpage at the subdirectory location just as you requested.")
- This all happens in ~5ms per request
Let's build it!
First, you need your DNS routed through Cloudflare and the traffic to be proxied (i.e. the clouds must be orange).

Next, go to Workers, which are in the top level of your Cloudflare account, and create a new Worker.

Next, navigate to "edit code" and paste the following code into the Worker:
export default {
  async fetch(request) {
    async function MethodNotAllowed(request) {
      return new Response(`Method ${request.method} not allowed.`, {
        status: 405,
        headers: {
          Allow: "GET",
        },
      });
    }
    // Only GET requests work with this proxy.
    if (request.method !== "GET") return MethodNotAllowed(request);

    // Get the URL that was just requested.
    const url = new URL(request.url);

    // Swap out the subdirectory with the subdomain to request the actual URL.
    const originUrl = url.toString().replace(
      'https://example.com',
      'https://blog.example.com'
    );

    // Fetch the origin.
    const originPage = await fetch(originUrl);

    // Return the subdomain, as the subdirectory.
    const newResponse = new Response(originPage.body, originPage);
    return newResponse;
  },
};Here's what it looks like in the dashboard:
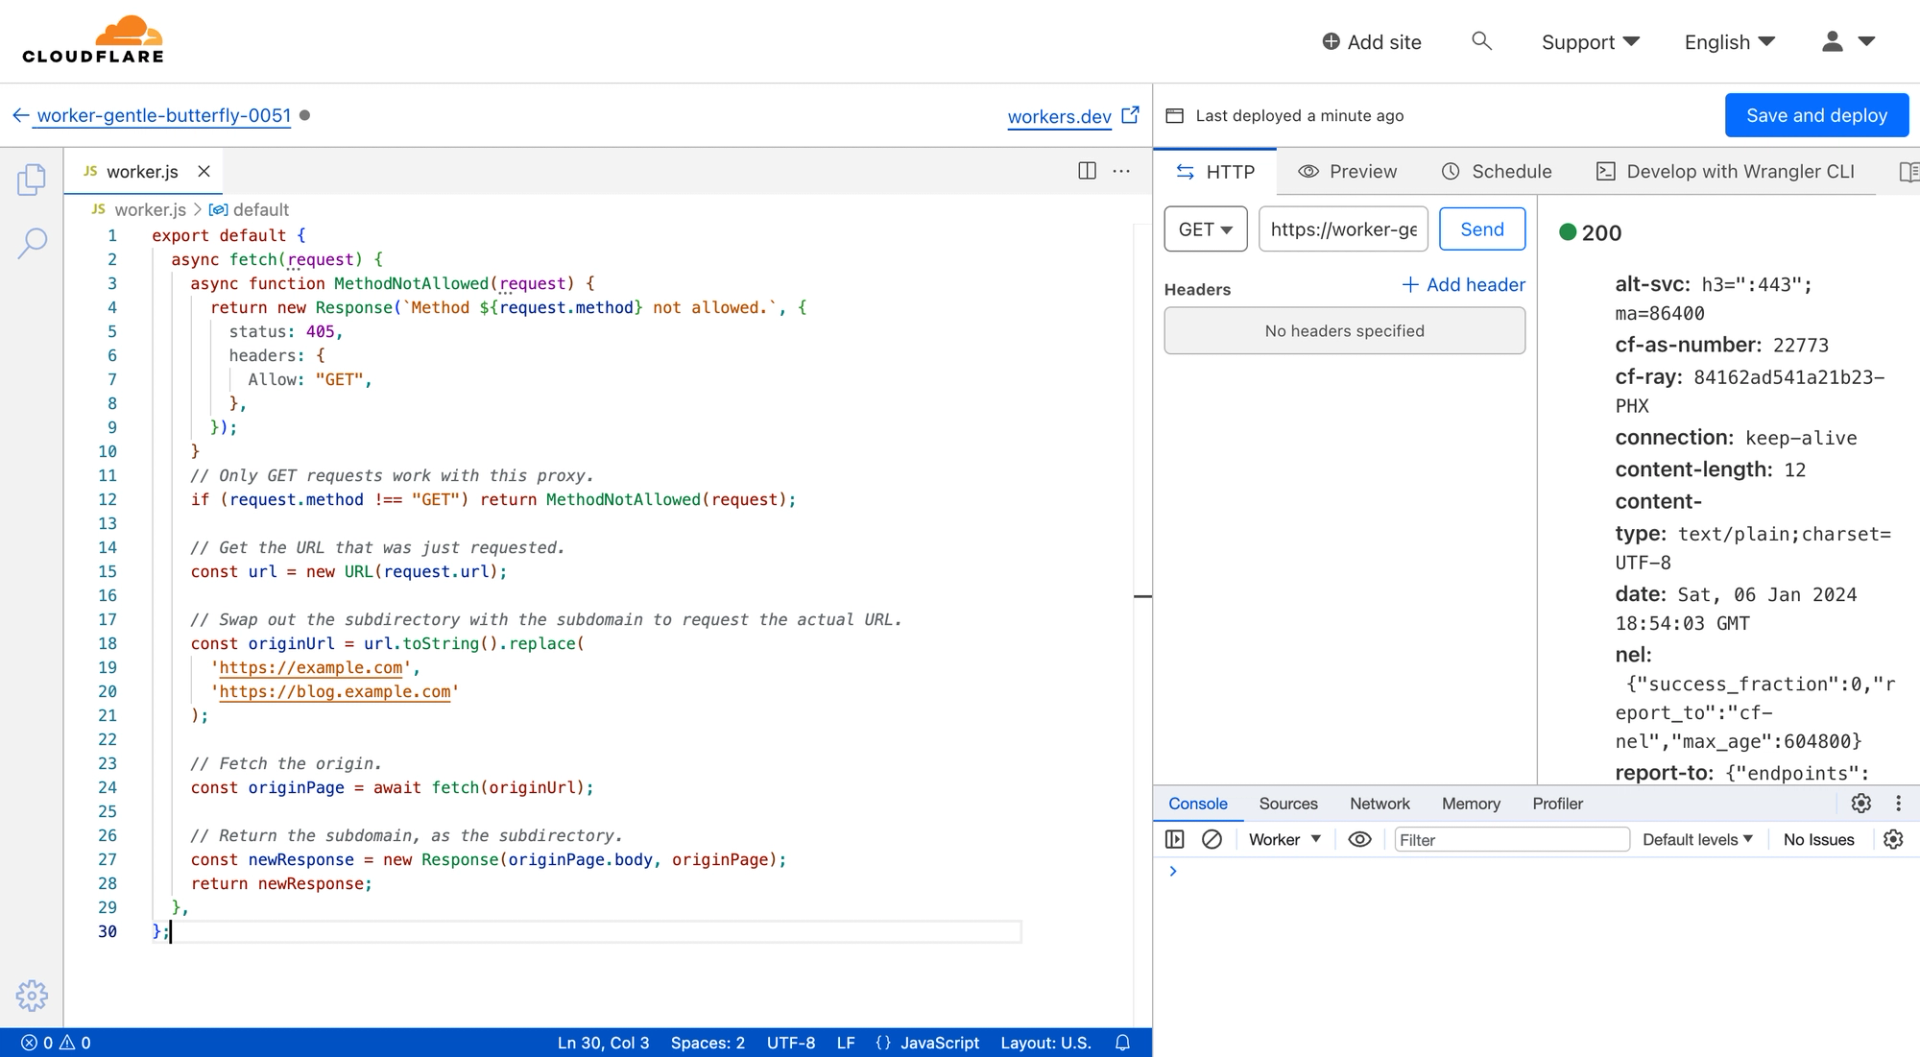
Be sure to change out the URLs to yours. The first is your root domain, and the second is the subdomain/other website. You can use a completely different domain than your root if you want to reverse proxy a different URL altogether.
Once that looks good, click "Save and Deploy".
In summary, the code looks at the URL being requested and swaps it out with another URL (while still making it appear to come from the URL requested).
The code won't do anything until we tell it which URLs/routes to run on.
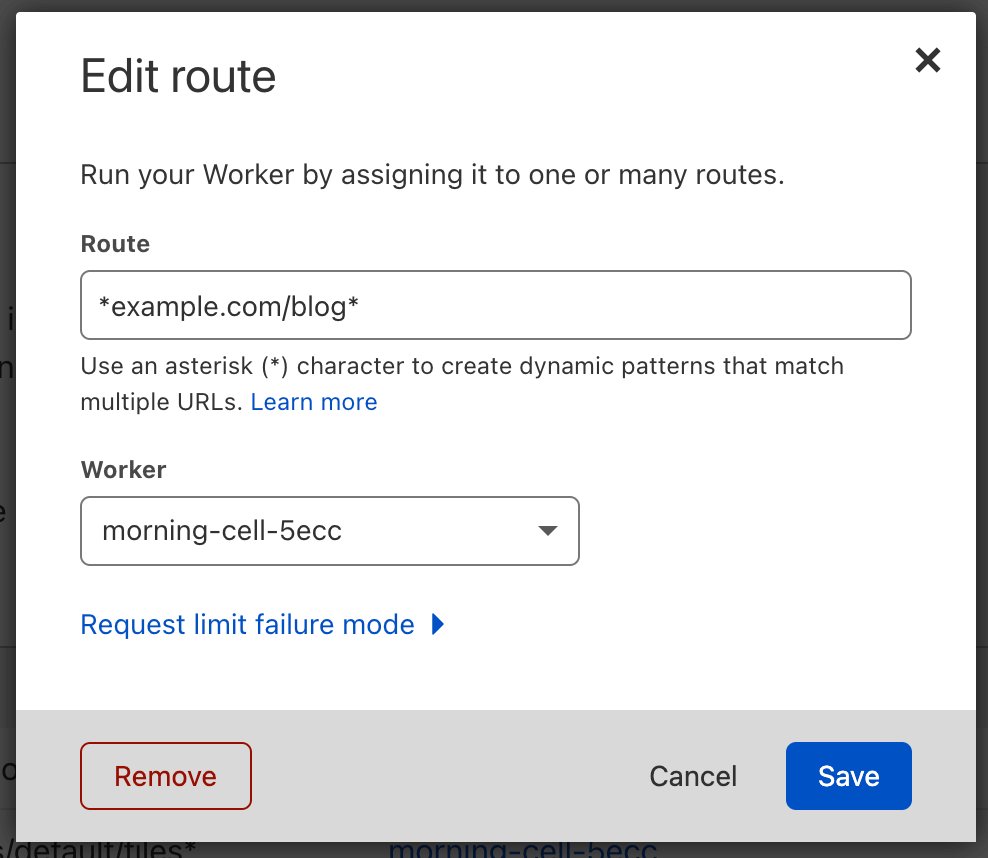
Next, we are going to tell Cloudflare on which URLs the code should be executed.
Go back to Workers and Add Route. Here is where we tell Cloudflare our subdirectory path(s) to run this code on. Add the path example.com/blog. The asterisks are wild cards, so the URL will match additional subdirectories. Add the Worker we created and save it.
We need to add routes for every URL that is requested. We just added the routes that the user will request, but the webpage will make additional requests to get assets such as images, CSS, and JavaScript.
While your blog is available at /blog, your assets are not.
Find your asset URsL. I recommend watching this video to help out with this. Basically you can inspect the HTML and finder which asset URLs are still pointing to the subdomain and add them as routes (using wildcards so you don't need to add a route for every image, rather just the image directory).
Once you save it you should be able to visit your website subdirectory and see your subdomain. Pretty cool!
Redirects, SEO, and other subdomain references
We have a problem. Actually many problems.
First, the subdomain is still available. Meaning Google and your users can wind up on it creating confusion on which site is the proper one and therefore killing traffic.
Secondly, if you inspect your subdirectory HTML, you'll likely find references to your subdomain.
I often see canonical tags pointing to the subdomain. This is detrimental because it tells Google that you want them to treat your subdomain as the main version. NO!! This is horrible for SEO.
So I built out all the code to handle this for you and it's called Slashblog. You can purchase it and deploy it in just 5 minutes.
It'll do many things including:
- Redirect the subdomain to the subdirectory
- Serve your subdomain as a subdirectory
- Update your sitemap to point to the subdirectory
- Ensure WordPress, Drupal, HubSpot, Webflow, and other platforms work seamlessly after deployed