Importing Data Into Sanity: Gotchas, Best Practices, Helpful Tips
Everything I wish I knew before creating my Sanity import scripts. Hope this helps you migrate your data to Sanity!
I migrated my 8 collections and 1,138 records from Webflow to Sanity.
In this article, I'm going to share with you the gotchas, best practices, and things I wish I had known before I started creating my Sanity import scripts.
Hope I can save you time and headaches...
Offload This
Skip the headaches and save hundreds of hours.
I'll migrate your data to Sanity in 1/10th of the time it'll take you.
I'm not bragging, just stating the fact it took me a long time to import data at first, but now I've got it down.
I would love to migrate your data.
Nomenclature
"Import" not "Migrate"
When doing your Googling and ChatGPTing, search for "Sanity import data" not "Sanity migrate Data".
A migration, with respect to Sanity, is when all of your data is already in Sanity and you want to bulk modify it such as concatenating two existing fields.
Importing data is loading new data into Sanity.
Also note, that I still refer to the entire process as a migration, because holistically it is. Once you get to the Sanity import step, Sanity is not aware of anything but the import, hence calling it an import. I digress.
Sanity Dataset, Documents, and Document Types
Sanity Dataset – your database of content that is stored in the Sanity Content Lake
Documents – your records; each individual piece of content
Document Types – Synonymous with collections, models, and content types
IDs Are The Ruler Of References
This probably won't come as a surprise, but maintaining field references is done by referencing the ID of the other documents like this:
{
  _ref: `imported_${item}`,
  _type: 'reference',
};
I note this for two reasons:
- Ensure that whatever ID you assign to your document is predictable. That way when you reference it later, you know how to formulate the ID. For example, slugify the title, and boom, we have our ID. In my example, I prefix the item with "imported_" to keep track of imported documents and to ensure it doesn't clash with any existing data.
- Sometimes the source data will only give you the IDs of existing references (instead of a slug or something comprehendible) necessitating the use of the source ID during the migration.
Importing Assets Via The Client Libraries
I read in the docs about a super awesome feature when importing assets, however, I couldn't get it to work.
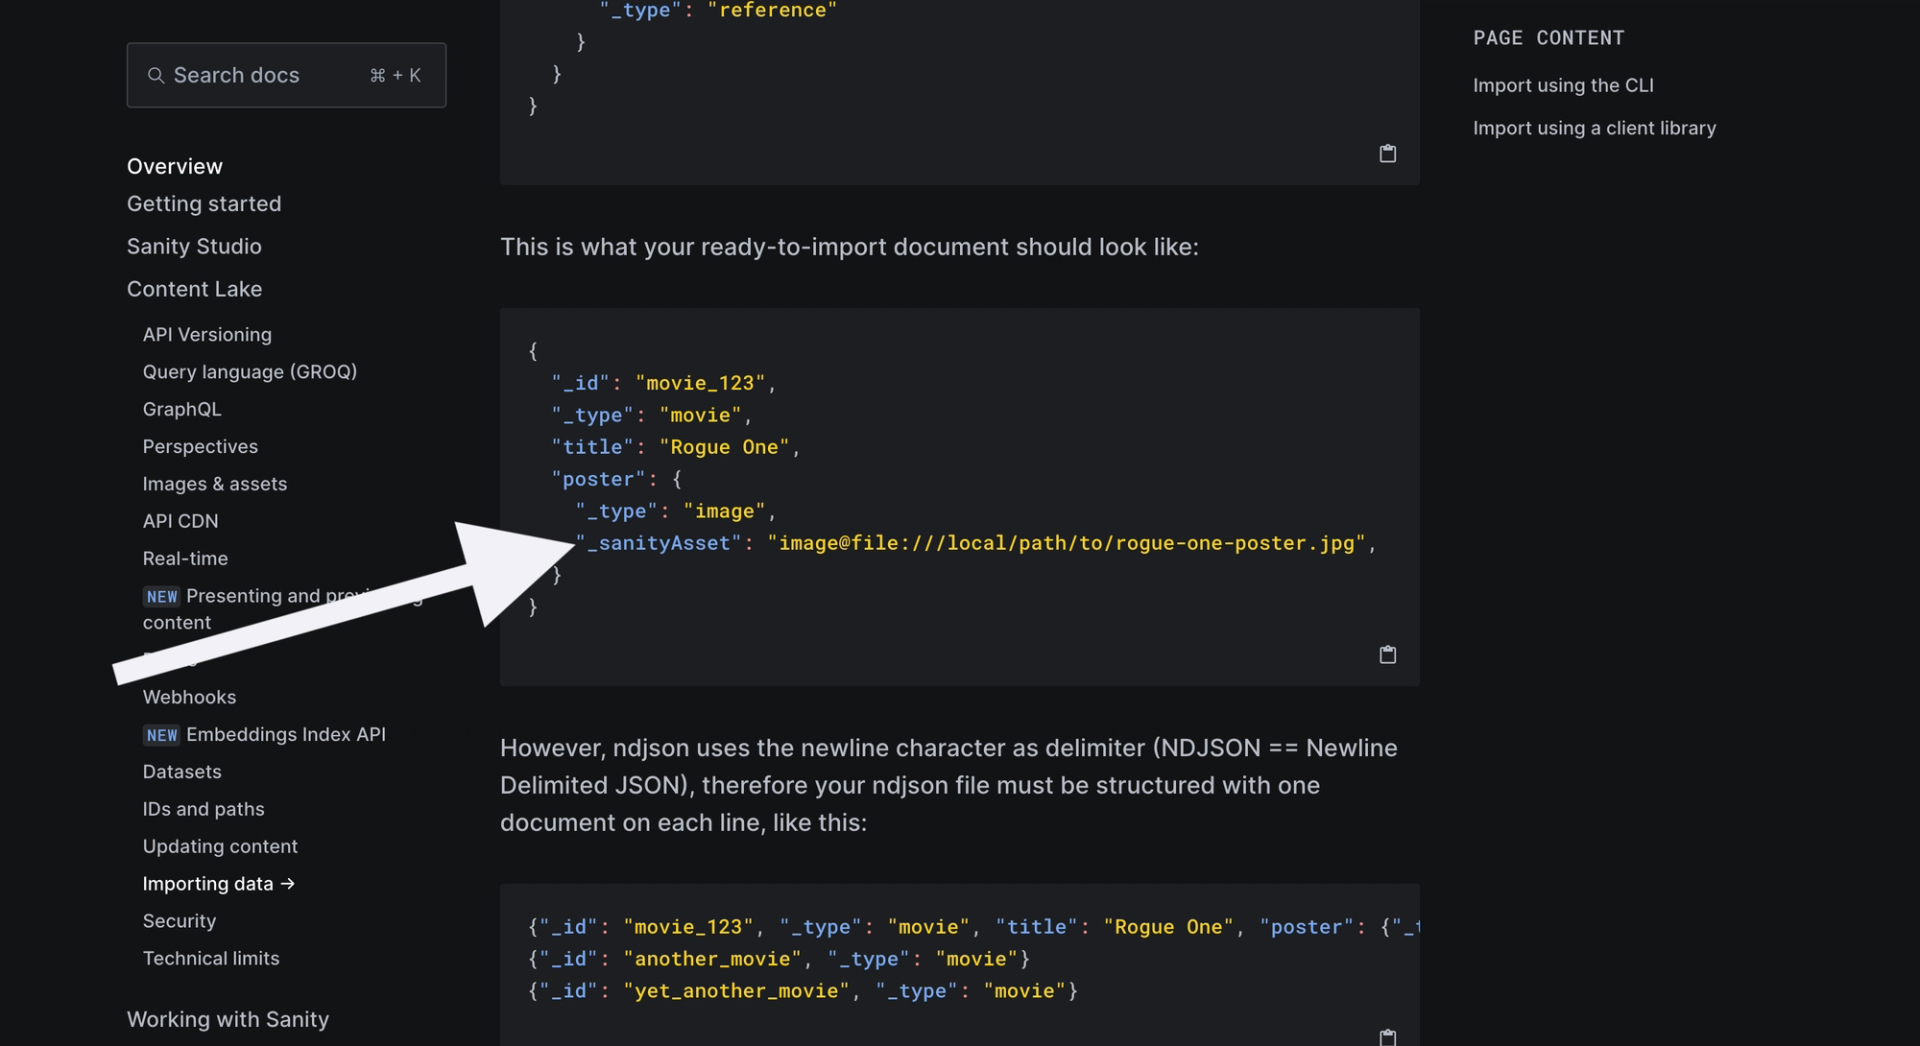
The feature is the "_sanityAsset" key in lieu of the reference key and which allows feeding it your asset URI in lieu of the reference ID like this:
"myImageField": {
    "_type": "image",
    "_sanityAsset": "image@https://example.com/myimage.png",
}
One of the challenges in importing your data into a Sanity dataset is maintaining image references.
Images/assets are unique in that they aren't documents, but rather files, so creating the reference is difficult. Assets do, however, have corresponding asset documents which contain metadata about the asset including the path and URL to it.
Let me clarify the challenge with this example:
- You have a blog post with an image field
- You first have to upload the image
- Then when you upload the blog, you have to reference the image, but the image is now only referenceable by its ID which is not predictable, unlike content-to-content references.
- Therefore you must maintain the responses when uploading asset documents to reference the returned ID in your blog posts.
The "_sanityAsset" feature was a way around this predicament. No need to feed it the reference, give it the image/asset URL, and it'll upload the asset and create the reference automatically.
My unverified conclusion is that this only works in the CLI and not the client libraries.
I came to this conclusion after trying so many times and scouring the web and source code for any hints. I found like three mentions of it across the web. This article will be the fourth.
HTML To Block Conversion
Probably the most tricky thing is handling HTML and converting it to Portable Text.
Sanity has something node package called Sanity Block Tools.
Here's the example they provide:
htmlToBlocks(
  const html = 'your html goes here',
  blockContentType,
  {
    parseHtml: (html) => new JSDOM(html),
    rules: [
      // Special rule for code blocks
    ],
  },
)
You call "htmlToBlocks" and pass in the "blockContentType" which contains your schema config for block content.
With that info, the conversion is able to align the HTML with your allowed features such as H4s and blockquotes.
My suggestion is to first get the basic conversion from HTML to Portable Text working.
Then, start messing with rules.
In the rules key above, you can add various manipulations to your content.
For example, for every code element, convert it to a Sanity compatible Portable Text object.
I'm using the code input plugin and the following rule to accomplish this:
deserialize: (el, next, block) => {
    const codeElements = ['pre', 'code'];
    if (el.nodeType === 1 && codeElements.includes((el as HTMLElement).tagName.toLowerCase())) {

        const element = el as HTMLElement;
        const code = element.querySelector("pre")?.outerHTML;

        return block({
            _type: "code",
            code: code,
        });
    }
}
If you are importing a lot of rich text like myself, you'll spend a good amount of time creating rules to ensure your content arrives at Sanity leveraging all of the Sanity greatness.
Use Create Or Replace
Shout out to Sanity for creating a "createOrReaplace()" function!
Use it!
Migrations are heavily iterative.
Without this function, when attempting to import the same document twice, you'll be attempting to import duplicate document IDs causing an error.
This function enables the content to be loaded over and over again without throwing an error that the content already exists or duplicating the content. It will in fact replace the existing document.
Note: This function is the same as the command in the Sanity CLI "replace existing document". Or the opposite would be using the command "skip importing document" when creating documents that already exist. I chose to use the client libraries to import data. I can't compare and contrast them as I only chose the client libraries, however I chose it because I wanted to run a script that handled end to end migration without have to export source data into files and import transformed data via JSON files (in NDJSON file format).
No joke I'll run some of my scripts 100 times to get my Sanity Dataset looking perfect and create or replace is a lifesaver.
Separate from this function, it also appears that when attempting to upload existing assets again, it won't duplicate the assets.
Deleting All Content
I found the need to delete all content when I wanted to run a fresh migration... this usually occurred when the script was just about done.
I found the following command online that deletes all content of a type:
sanity documents query "*[_type == 'myPost'][0...50]._id" --apiVersion 2021-03-25 | npx groq "*" -o ndjson | xargs sanity documents deleteBe sure to replace "myPost".
This Sanity guide provides a full tutorial on using this command.
The number 50 in that command instructs Sanity to delete 50 elements. The guide recommends 20 because rate limiting but I didn't have an issue with this on my project.
Create A Test Record
There are three steps to a migration: extract, transform, and load (ETL).
For me, extraction was simple.
But I quickly realized every time I ran my script it would wait on the API call to extract.
If you use APIs (as opposed to exporting to a CSV or other file format), I recommend saving a response/creating a test response that your script retrieves.
This way you can engineer the content to be test-suitable such as:
- Not having too many images (some of the tests would take too long because 10 images were uploaded from my blog)
- A variety of HTML such as block quotes, figures, and code
- Other edge cases you might run into
Of course, the true test will be migrating all your content and combing through your Sanity dataset, but a single record will expedite the process and get the majority of use cases taken care of.
Internal and External Links
You'll quickly find out that internal and external links are two different annotations in Sanity.
This is because internal allows for referencing documents (specifically document types you allow it to reference). And external has a different set of features like opening in a new tab or adding rel="nofollow".
Therefore, the way you handle incoming data must adhere to how your annotations are set in the Sanity schema.
Here's how I handle importing external links and ensuring the proper attributes carry over:
if (!href.includes('mydomain.com' as string) && !href.startsWith('/') && !href.startsWith('#')) {
    const markDef = {
        _key: uuidv4(),
        _type: 'link',
        href: href,
        blank: target ? true : false,
        rel: rel,
    }
    return {
        _type: '__annotation',
        markDef: markDef,
        children: next(el.childNodes),
    }
}
I Love Sanity!
Creating any migration is going to come with gotchas. Sure I wish there were better documentation on certain things (like dealing with block conversions!), but all in all I must say I'm impressed by both Sanity and the API used for creating (or updating) content.
The flexibility it provides with a hybrid of code/schema and the open source UI (Sanity Studio) is a dream. There are some amazing Sanity projects out there that demonstrate the power of the platform.
Hire me to import your data into Sanity in under a week.