How to Serve Ghost as a Subdirectory (With Cloudflare Workers!)
Let's get those SEO benefits and serve Ghost from a subdirectory with this pretty awesome solution!
Love ghost, but hate serving it from your subdomain? Would you like to have a Ghost subdirectory on your root domain for SEO reasons?
With this solution you can have the best of both worlds... two platforms and serve them both from your root domain!
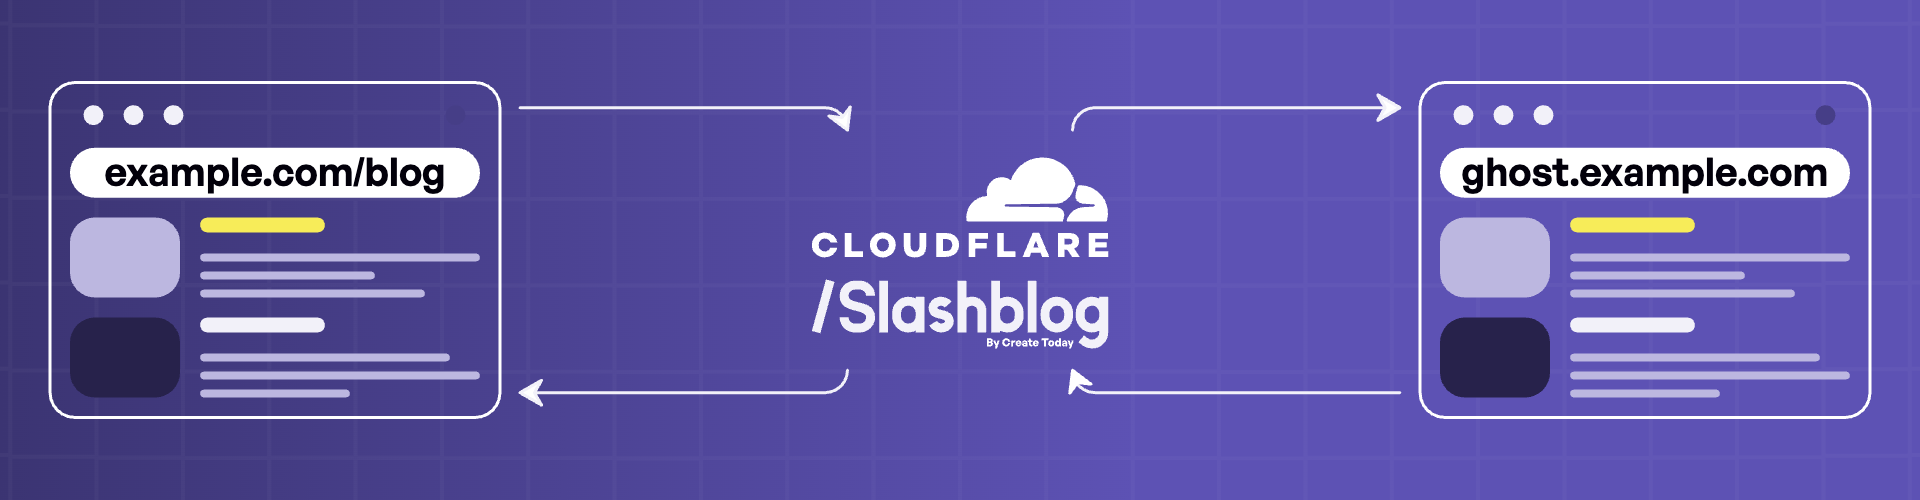
It'll turn your Ghost blog subdomain such as blog.example.com into a subdirectory on your root domain such as example.com/blog.
I'm going to show you how to make that subdomain show at example.com/blog (or whatever other slug) whether you're using Ghost cloud or self hosting it!
High Level Setup
Let's go over a high level overview of how all this will come together, then get into the nitty gritty.
- You have a Ghost site. Doesn't matter if you install Ghost on your own server or you are using their done-for-you Ghost cloud.
- You'll use Cloudflare to manage your DNS, and do some other awesome stuff (it's free and even if you aren't using this solution, Cloudflare is well worth it)
- We'll configure Cloudflare to do several things
- "Intercept" requests made to your nonexistent subdirectory
- Request your Ghost subdomain
- Return your Ghost subdomain at the subdirectory making it exist!
- It'll also modify the contents of it so that everything in it says, "I'm a subdirectory" and redirect your subdomain to your subdirectory
In summary, we are using what's called a reverse proxy to serve your Ghost subdomain as a subdirectory all through Cloudflare Workers.
Important: This tutorial involves purchasing my Cloudflare Worker code which I'm making available for a one-time fee because F recurring costs! Let's save some money and make money by boosting your SEO with a subdirectory setup!
Requirements and Things to Note
- You are either using Cloudflare or will move your DNS there (free and easy)
- You are a bit techy or can follow directions (we'll be using the command line)
- You don't need Ghost membership features... at this time it's not supported
- Your Ghost admin tasks will need to occur on the Ghost provided domain (e.g., https://example.ghost.io/ghost)
- You can either use their provided subdomain or your own, but the redirect will only work if you use your own
Step By Step Tutorial On Serving Ghost as a Subdirectory
Now lets go over the steps to make your Ghost blog serve from your subdirectory and get those SEO benefits!
Use Cloudflare and Proxy Your Domain With Rules
Cloudflare is free, and boosts performance and speed... there are soo many benefits.
I won't cover how to move your domain as it's easy and there are other guides.
Your root domain needs to be proxied:

This will enable the greatness of Cloudflare to work.
Your SSL certificate should be set to Full or Full (Strict).
How to Setup The Subdomain On Cloudflare
This part is key.
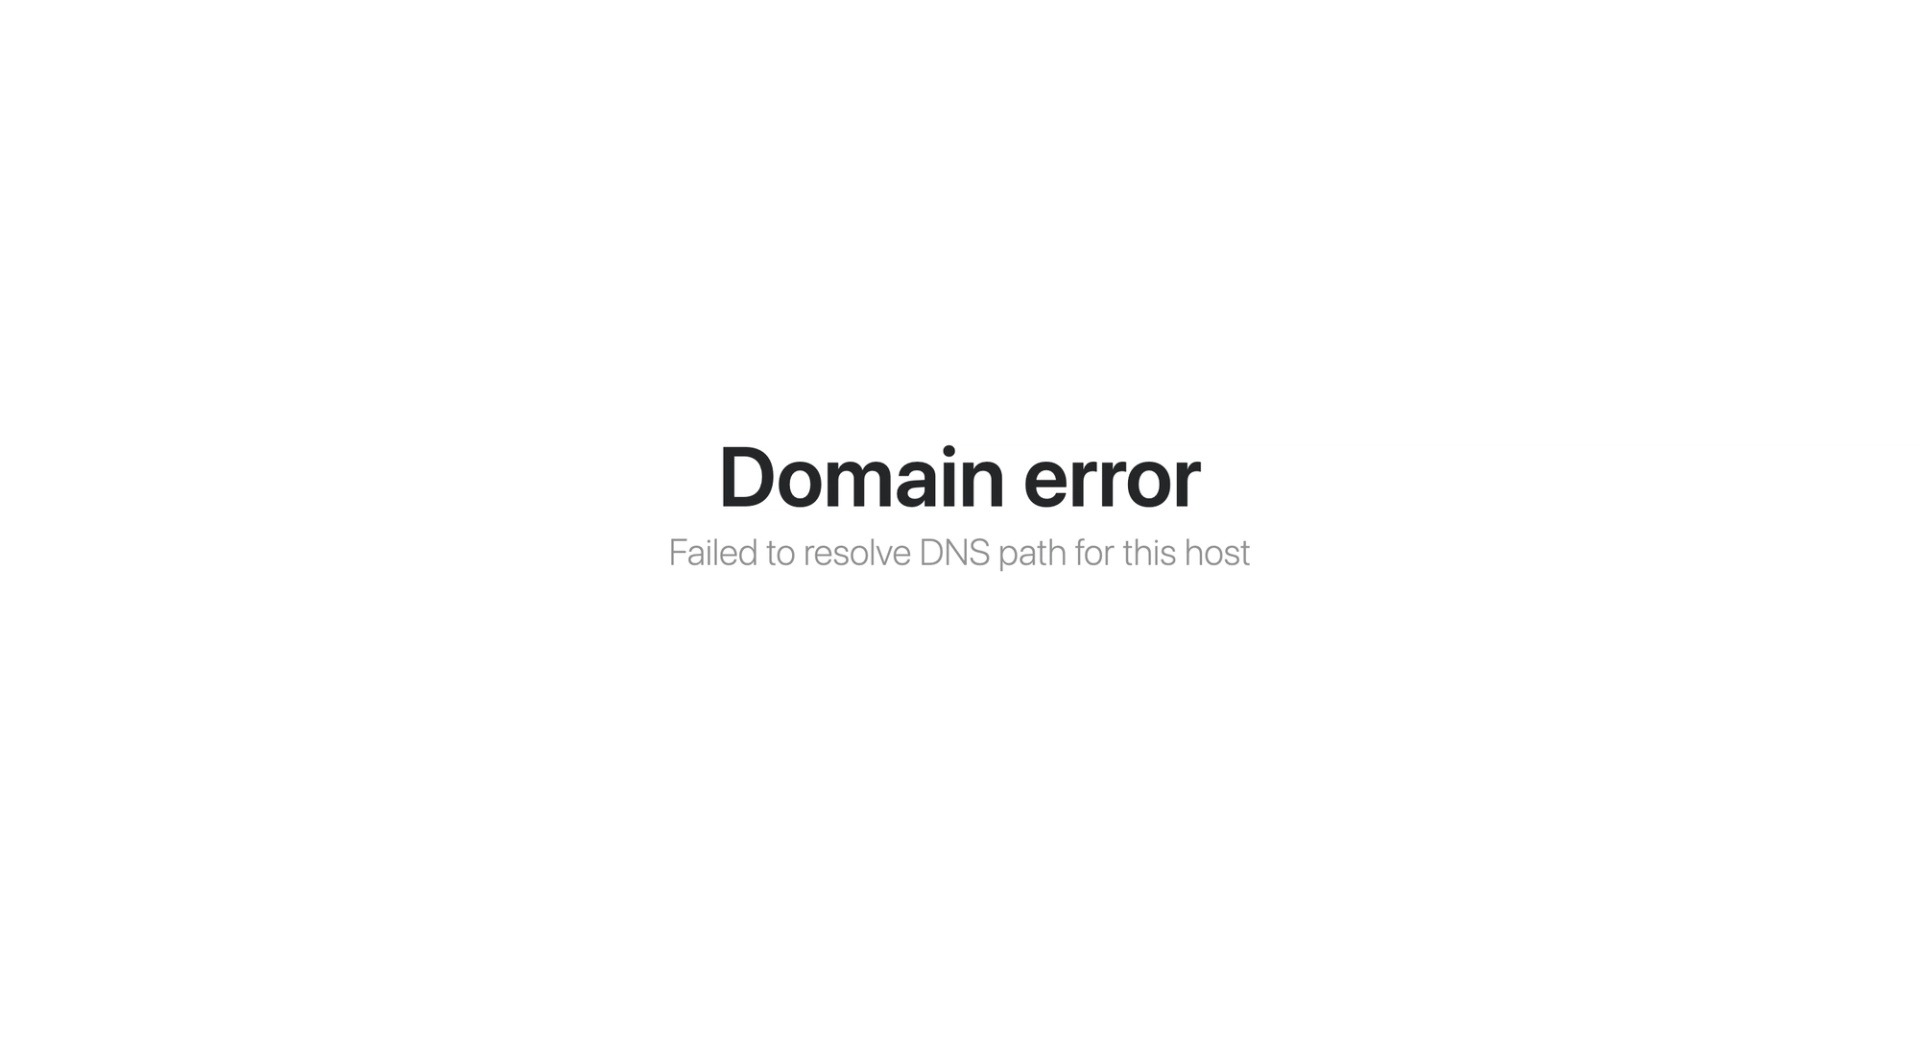
Normally you can't use Cloudflare proxy with platforms that provide their own SSL certificate (but I'll show you a trick). That's because when the proxy is on, the platform can't successfully verify where the records in your DNS point to. So you might think okay, I'll disable the proxy, have Ghost verify the records so the SSL certificate generates, then re-enable the proxy. The problem with this is the certificate needs to regenerate every 3 months. And failure to generate will trigger an error when visiting the site:
So what we are going to do is setup a Cloudflare rule that allows the SSL certificate generation to bypass the features of Cloudflare that might prevent it from generating.
This way, we can keep the proxy on and Ghost can successfully generate, and regenerate SSL certificates.
I recommend waiting to set up your domain in Ghost until this next part is done. That way we can verify it's working correctly; i.e., the domain will verify in Ghost and SSL will generate.
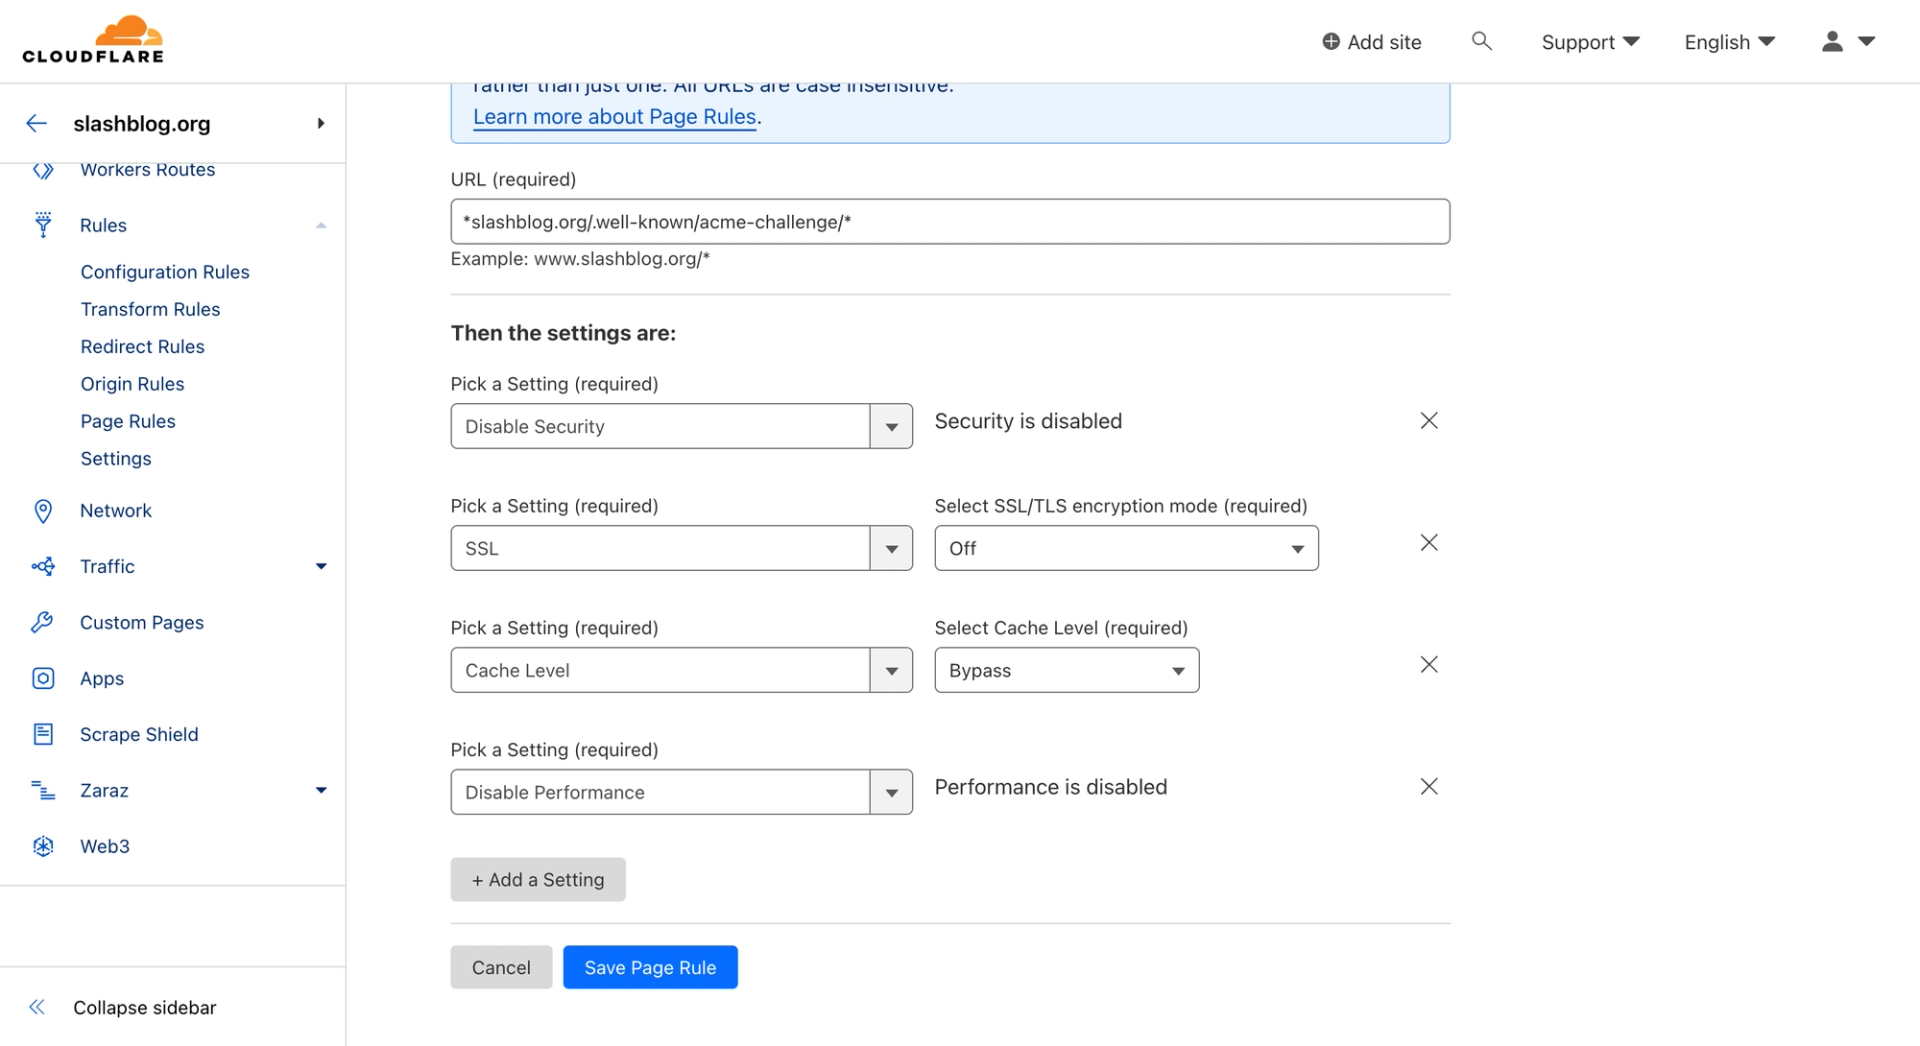
Head over to Page Rules here:
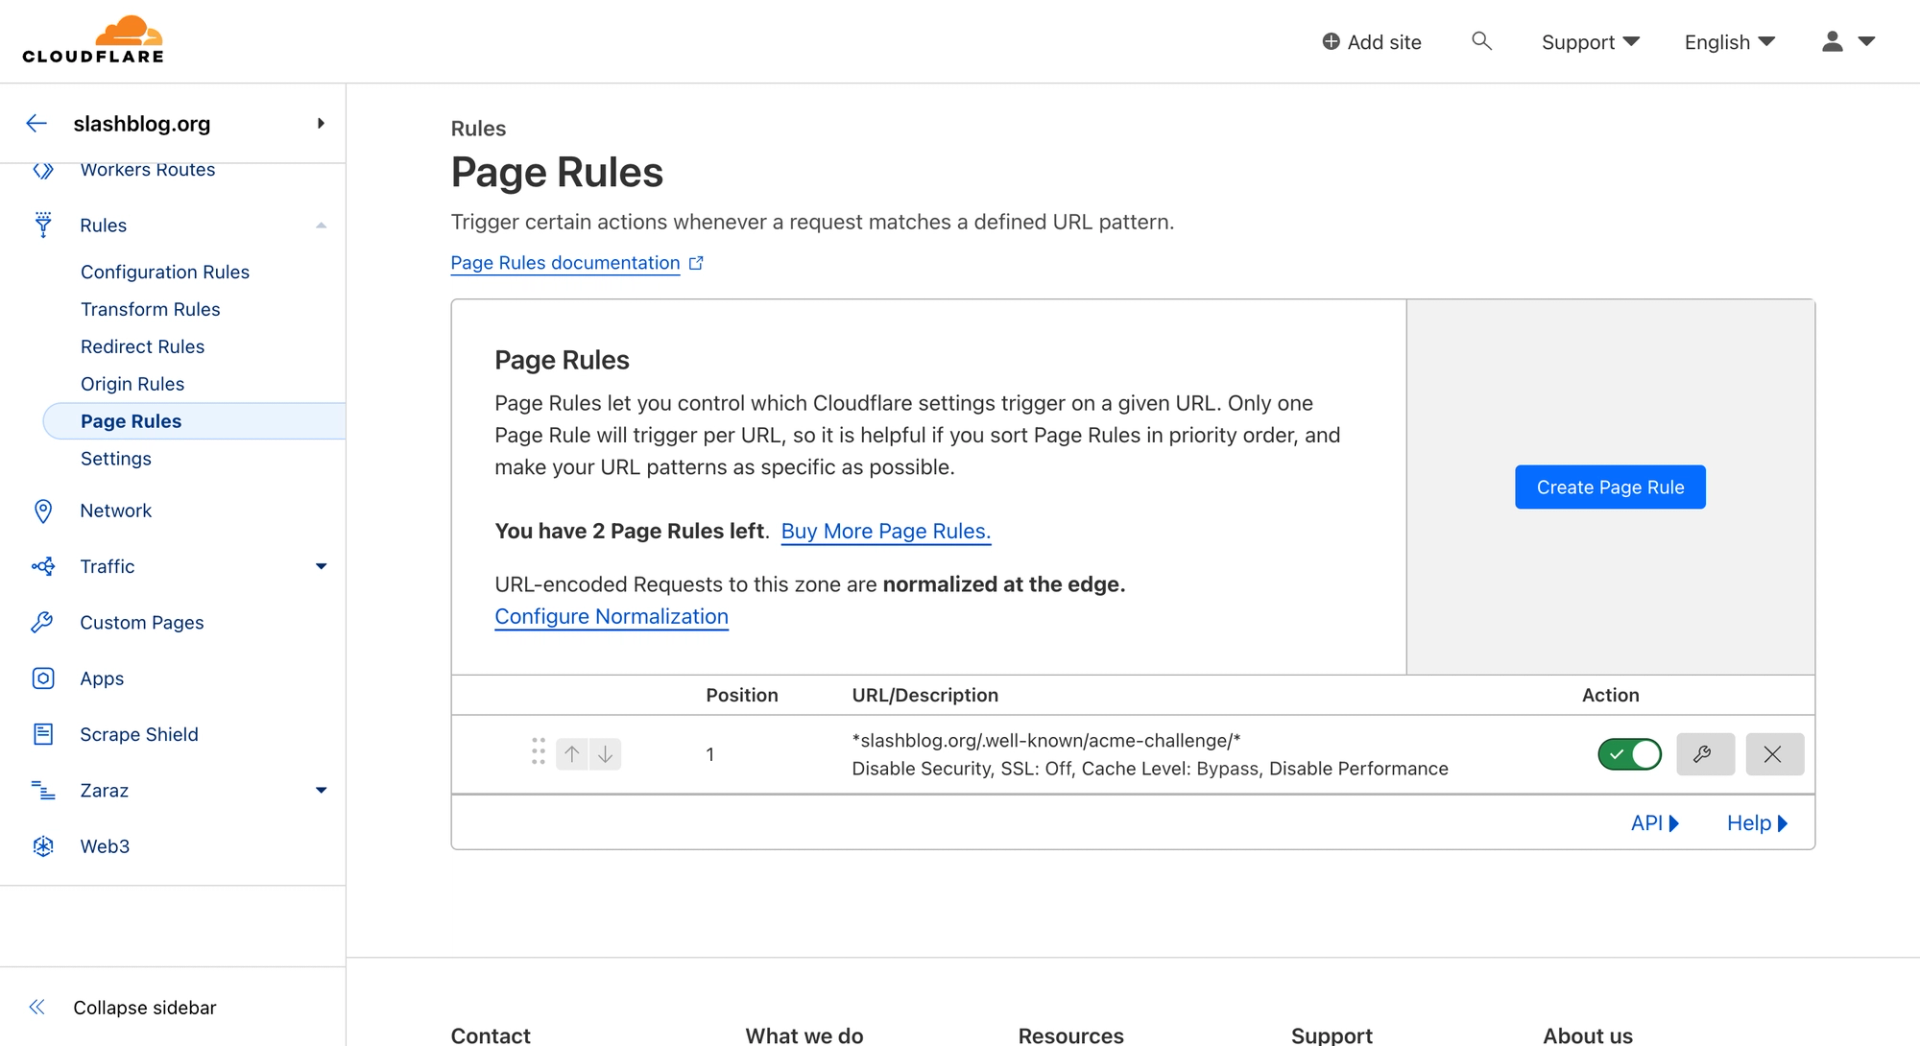
Then create a new one with the following settings:
- URL – "example.com/.well-known/acme-challenge/" (be sure to change out your URL and leave the wildcards)
- SSL – Off
- Cache Level – Bypass
- Disable Performance
All in all, it should look like this:
Buy Slashblog, The Cloudflare Worker
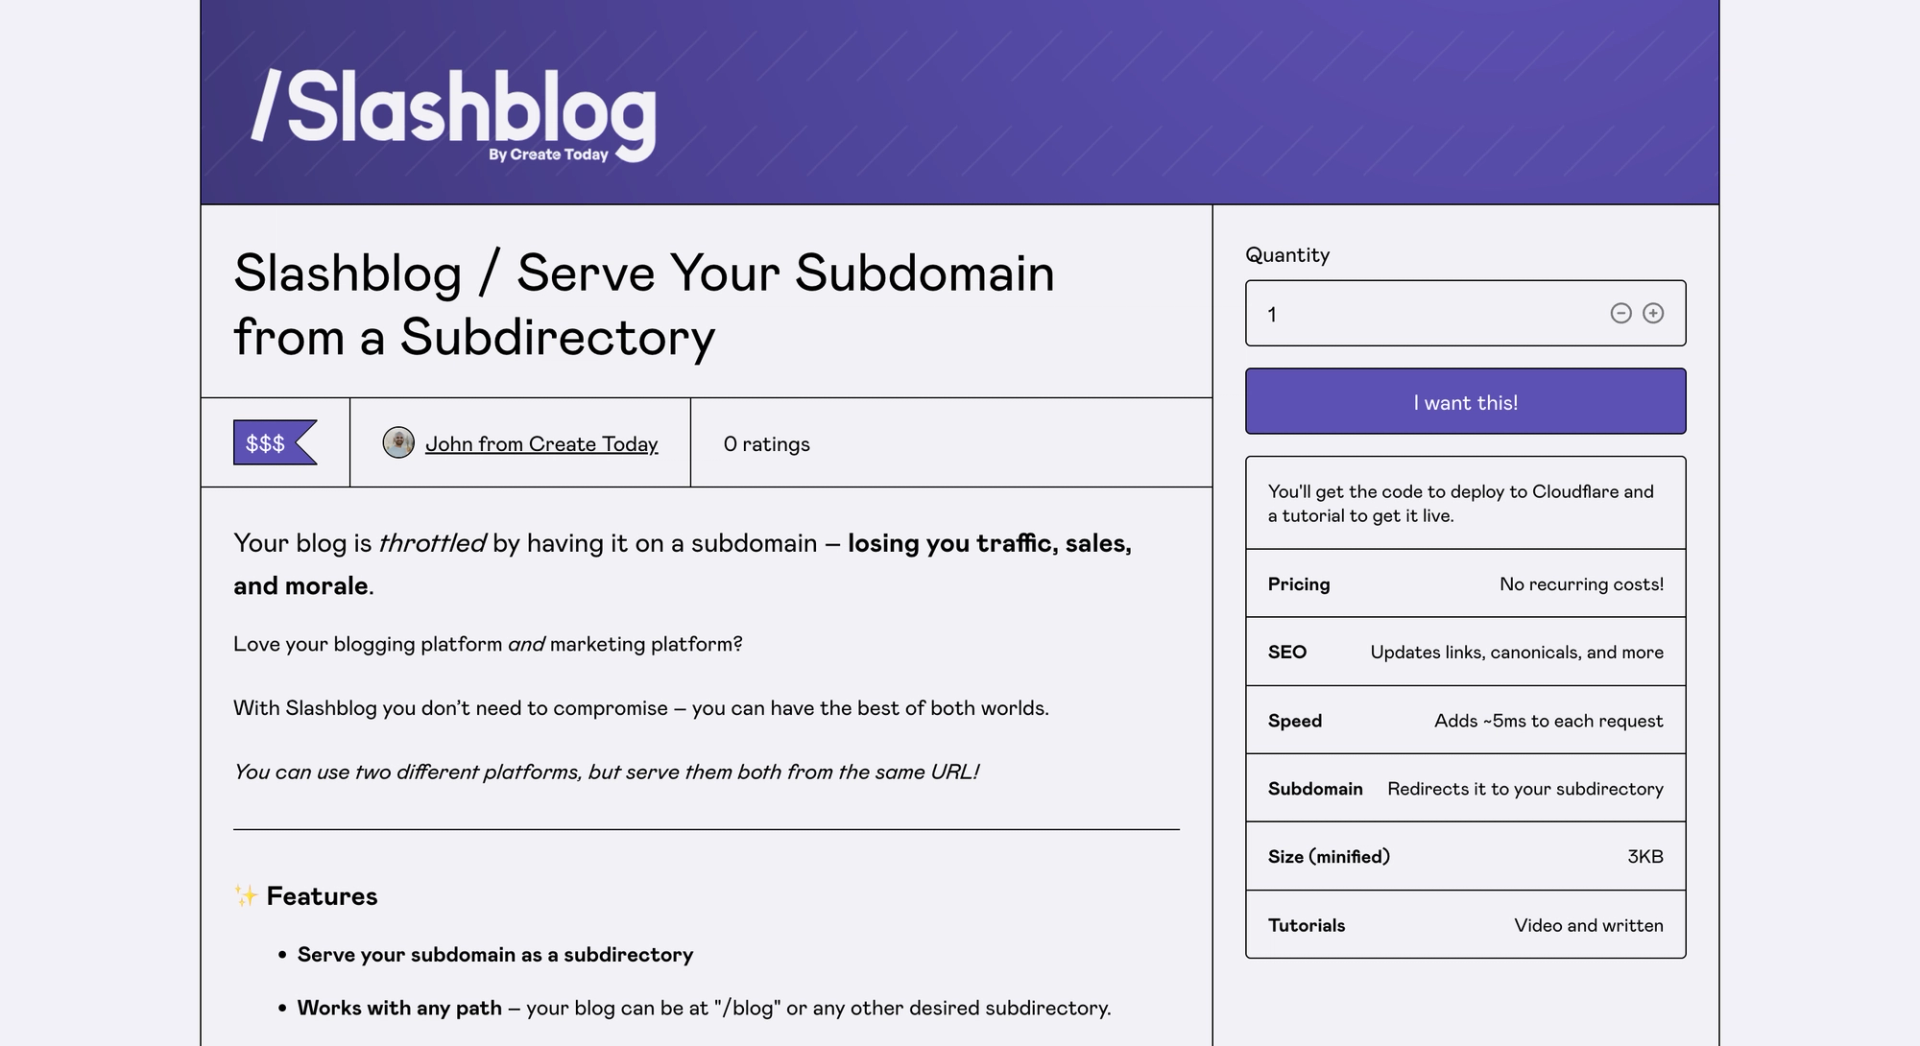
👉 Purchase Slashblog. 👈
Slashblog is a ready to go Cloudflare Worker. If you don't know, a Cloudflare Worker is an insanely fast place to run code.
Helpful tip: You'll receive a full video tutorial once you purchase. But this guide will give you a good idea on how to do it + it's Ghost specific whereas the video is not.
The code we are adding is the logic to retrieve your subdomain, modify the HTML to show your subdirectory, and more.
I wrote the code to specifically be compatible with Ghost and save you months of development.
Configure Settings to Match Your Domain Info
Now that you have the code, you need to plug in your settings.
In the download you'll see a wrangler.toml file. Wrangler is a command line tool by Cloudflare that lets you build and configure everything locally and push it your Cloudflare account.
All the building is done, we just need to configure it.
In the configuration, you'll see two prominent sections:
- Routes – the various URLs we want to run our Cloudflare Worker on
- Vars – the information about your site like what URL your Ghost site is on and where you want the Ghost subdirectory
Routes
Most of the routes are already done for you as they are the same between sites. For examples posts are just "/post-name", tags are "/tag/tag-name", and so forth.
There are several of them you need to configure and they are listed under "Custom routes."
- The URL of your desired subdirectory (e.g., https://example.com/blog*), matching all variations using a wildcard. The subdirectory is most likely the blog URL home, but can be whatever.
- The URL of your subdomain (e.g., https://blog.example.com/*) with a wildcard at the end to match any and all URLs. This is where your subdomain Ghost site is at. The main purpose of this is to redirect the subdomain to the subdirectory.
Vars
Let's change up the variables, which the code will reference.
- CLOUDFLARE_ACCOUNT_ID – head to any domain in your Cloudflare account and on the right you'll see your account ID. This is so when you push the Worker, it knows which account to push it to (of course it asks you to login).
- ORIGIN_DOMAIN – your subdomain which is the "real" domain
- BASE_DOMAIN – the domain root + desired subdirectory
There are several others that we'll leave alone for now and modify later as needed
Reviewing
It's really important to test before deploying, especially if you have a live site right now. There is definitely the possibility of breaking stuff when implementing this solution.
You can test several different ways:
- Using "wrangler dev" which lets you spin up a local instance of the Worker and navigate your site
- Using a test domain, so swapping out the domains in your wrangler.toml file with a test domain
If you're just starting your site then I suppose breaking things won't really matter? 🤷♂️
Deploying Slashblog
Next we are going to use the command line to push our Cloudflare Worker to your account.
Add the necessary tools:
- Open the command line and ensure you have npm installed. Install if not.
- Install Wrangler, Cloudflare's CLI for interacting with Workers
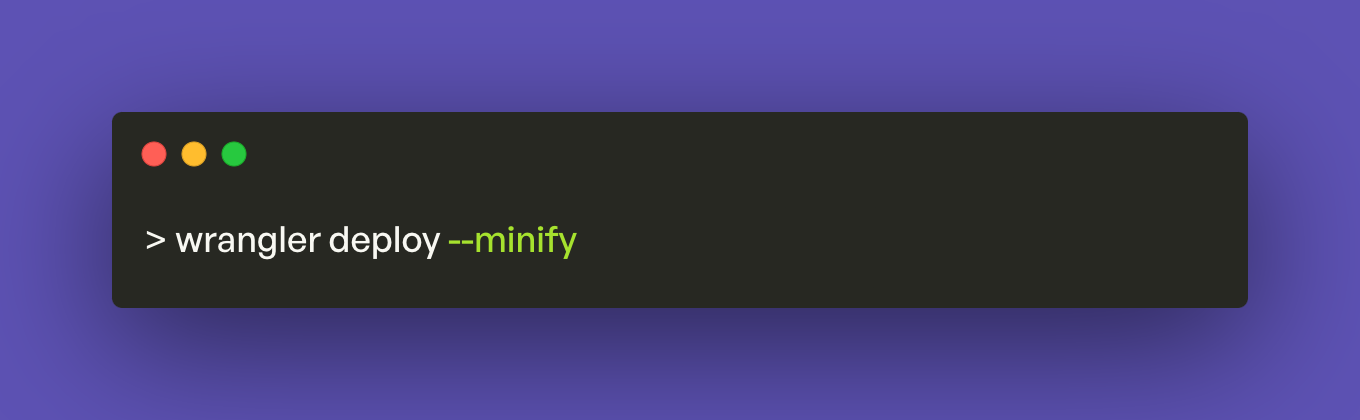
Next we'll run `wrangler deploy --minify`.
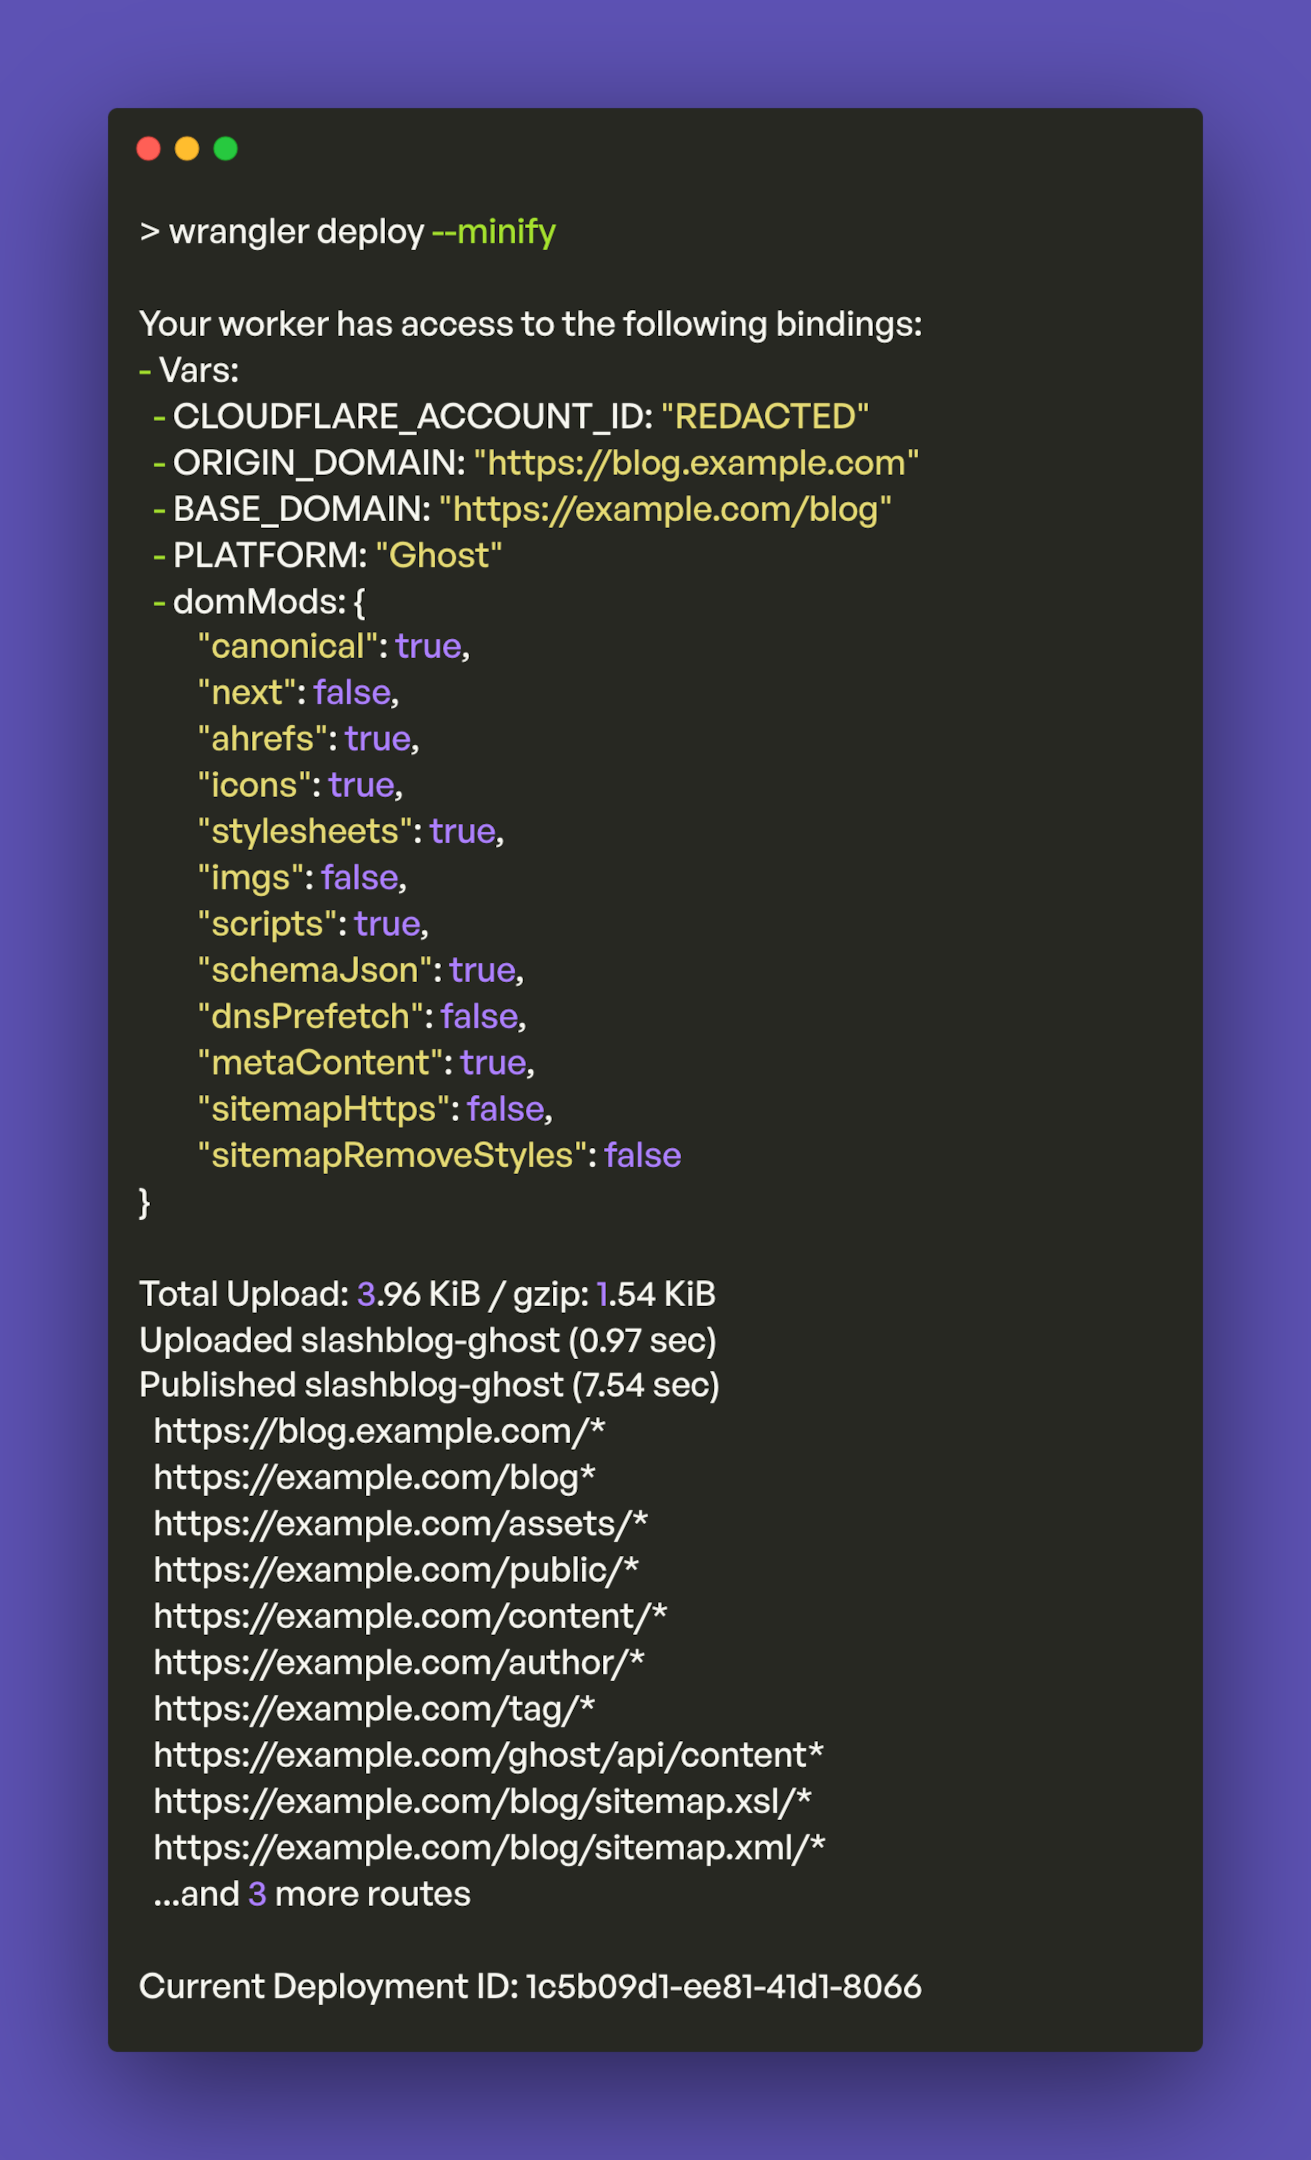
This will prompt you to login to Cloudflare, push the Worker, and add all the routes in the wrangler.toml file.
If there are no errors on the push, your Worker will be doing the magic right away.
Here's what a successful push looks like:
But just because the push didn't yield any errors doesn't mean it's all working.
Navigate, Text, and Fix Your Ghost Blog
In this part of the tutorial, we are going to look for obvious issues and not so obvious issues.
- First, go to your subdirectory and click around. Make sure it loads first and foremost.
- Second, go to your subdomain and make sure it redirects to your subdirectory.
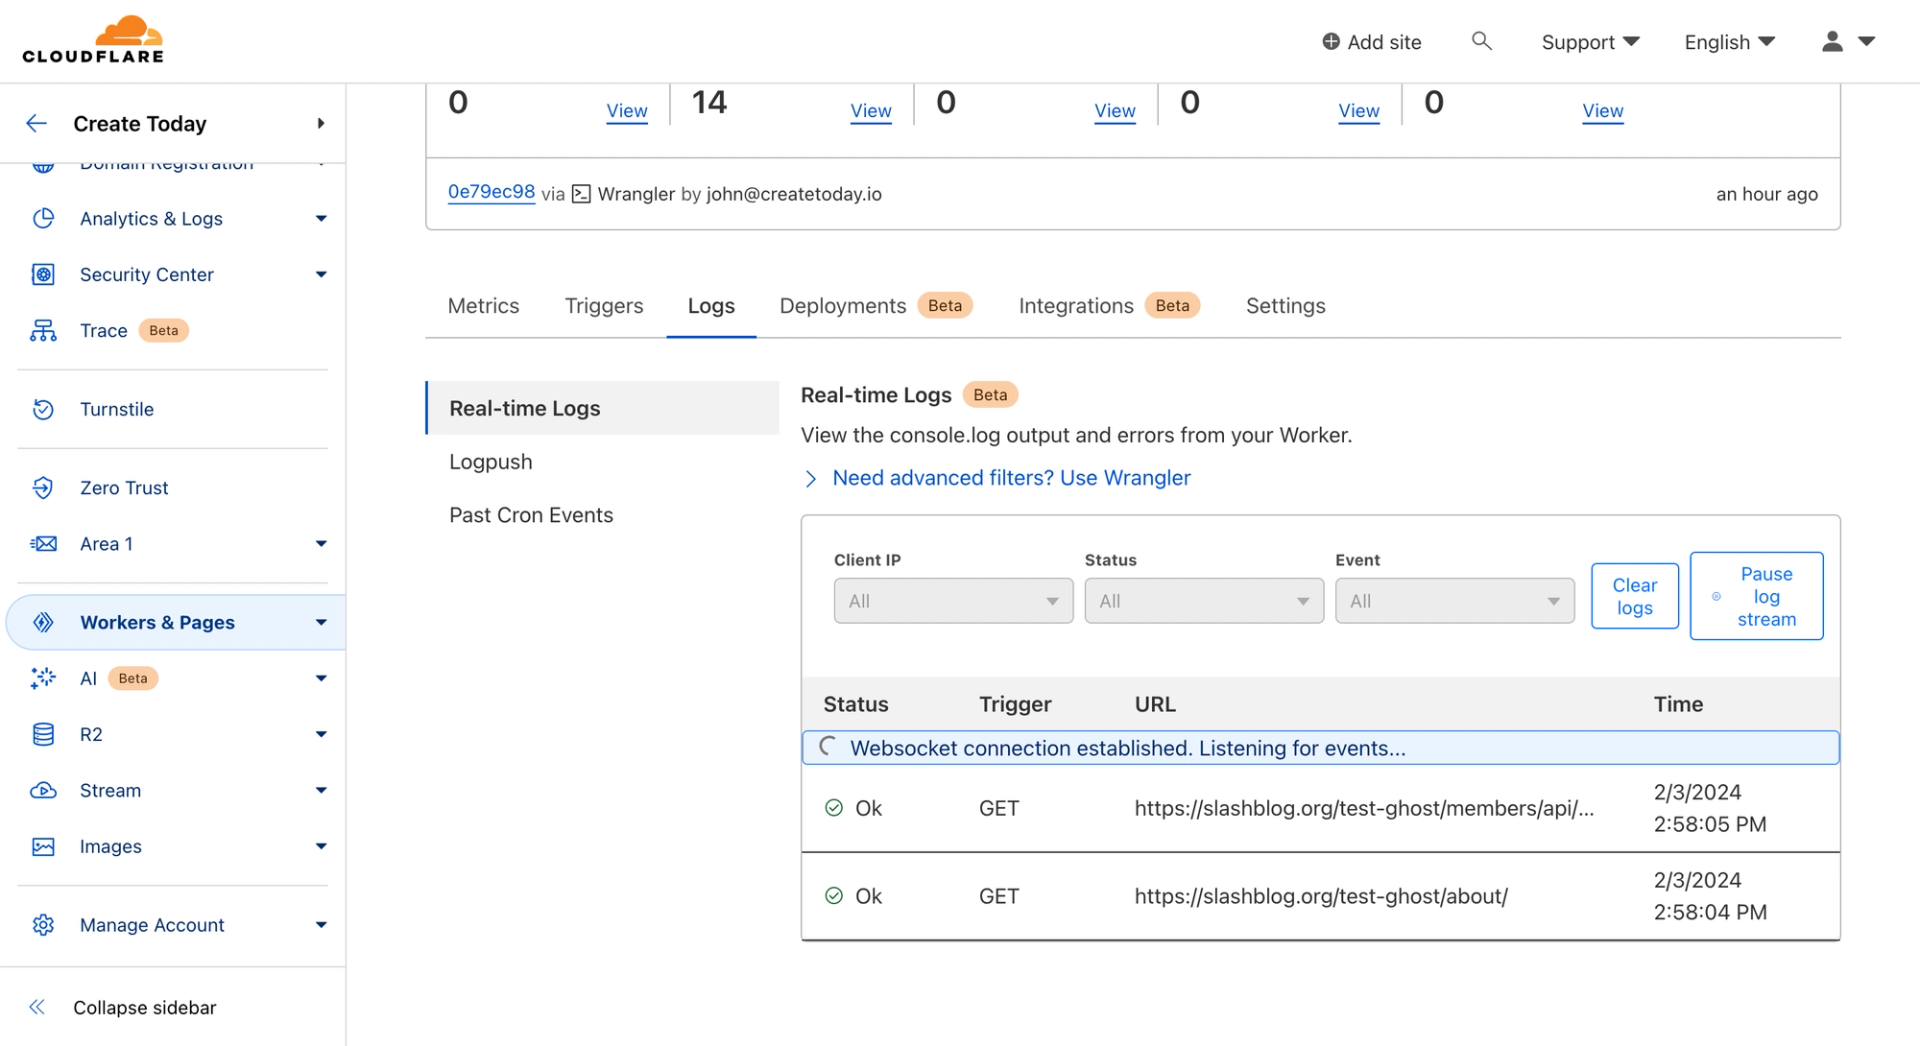
If those two things are happening, you're 80% there. If not, try to isolate what's happening. You can go to your Cloudflare Worker in the UI and enable streaming logs so you can see what's happening when you navigate your site.
Next, we are going to ensure that all the necessary HTML outputs your subdirectory.
Because Ghost thinks your website is a subdomain, they are going to output things like your sitemap, SEO HTML tags like canonical, and links pointing to your subdomain.
To find what needs changing, open your website and inspect the HTML. Search CMD + F for your subdomain and note the HTML tags they are contained within.
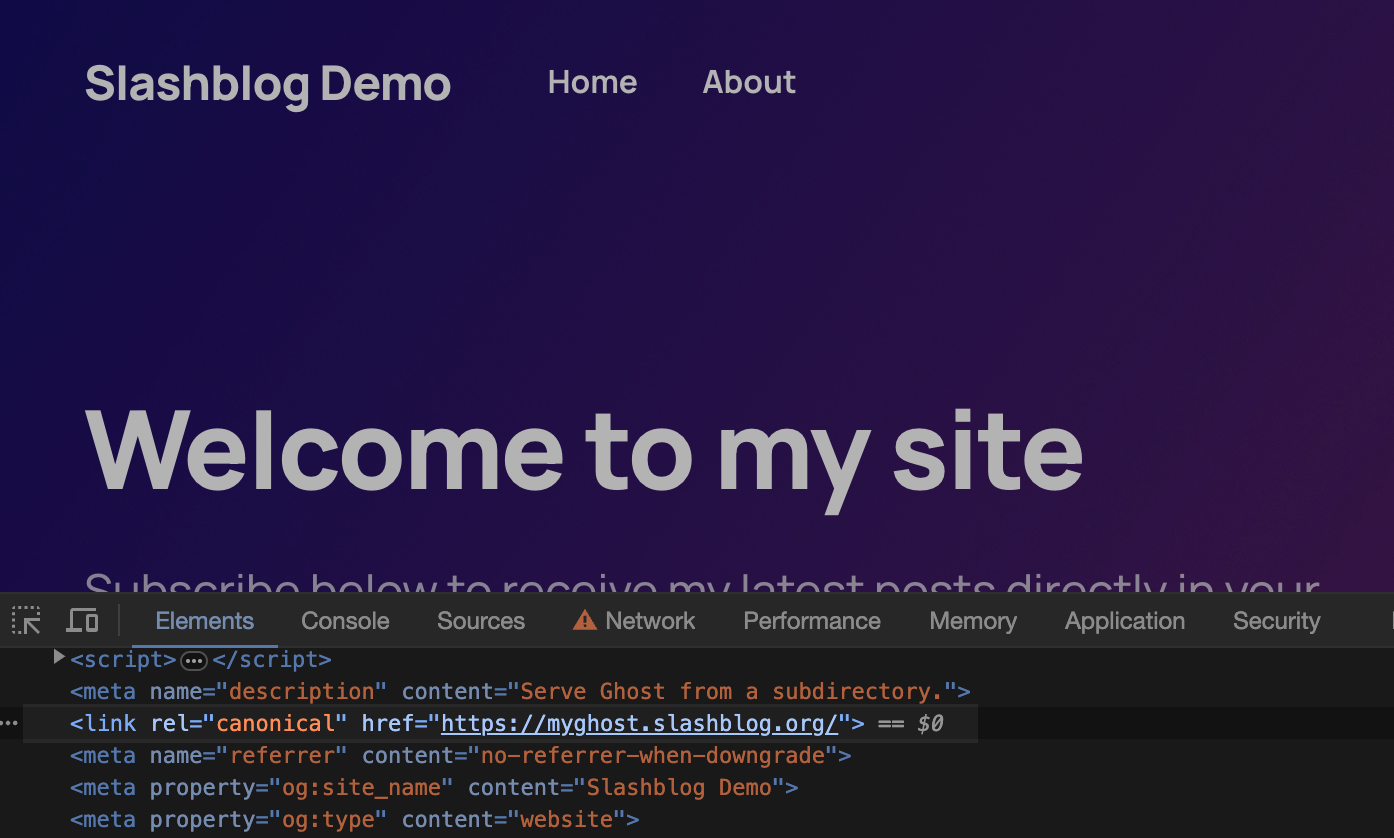
For example, there are link tags that output CSS, ahrefs that output links, and canonical tags that point Google to the authoritative version of the content. While your site may appear to be working, for SEO reasons you want to ensure all of the tags are updated.
Here's the canonical tag incorrectly outputting the subdomain still:
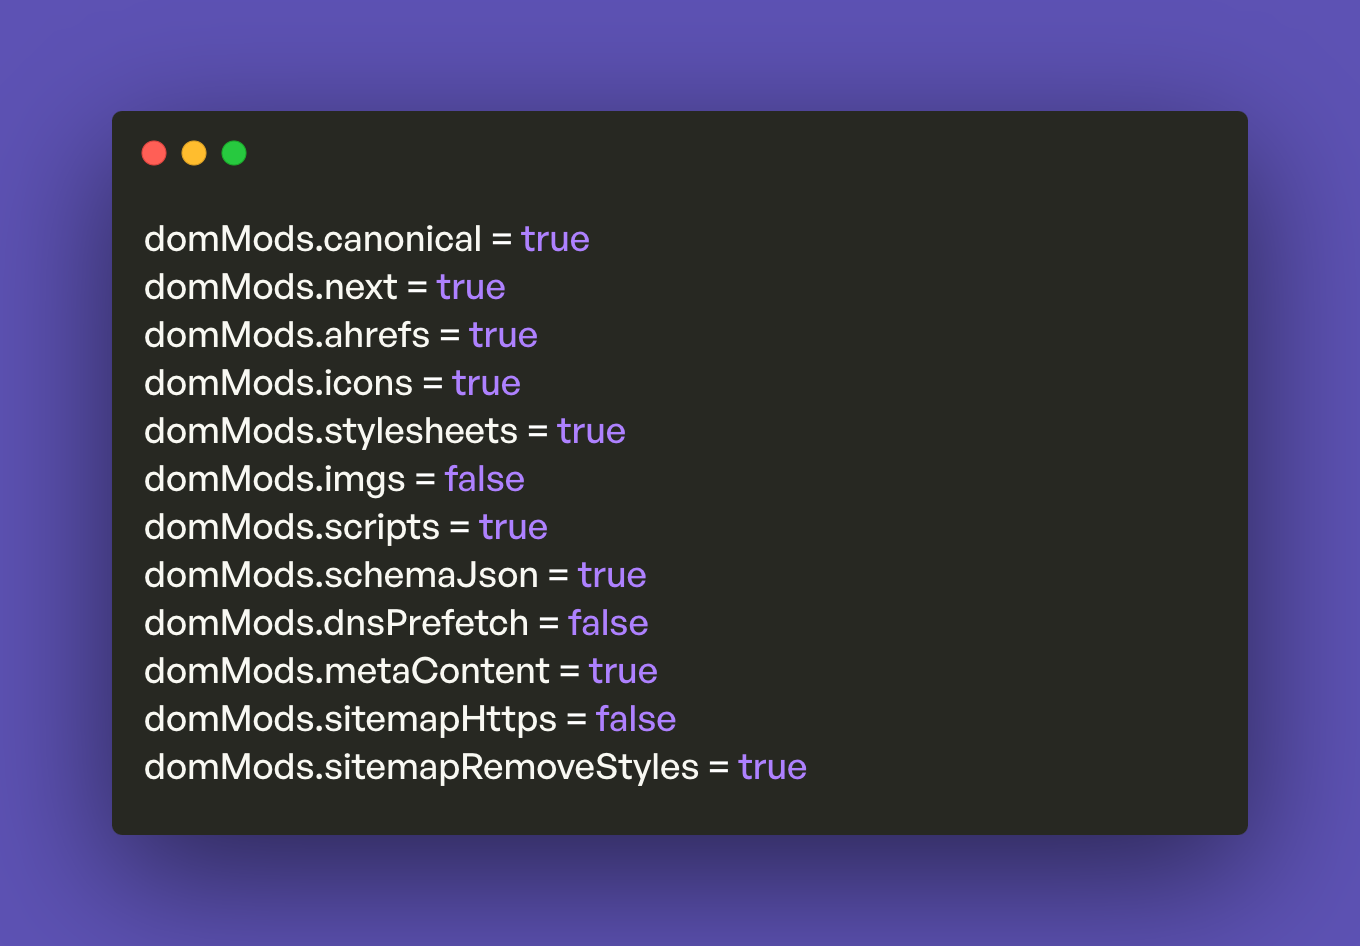
In the wrangler.toml file there is a section I said let's skip earlier. Here we are circling back to it.
It's the domMods vars.
These are true and false values that instruct the code to update the HTML if the variable is on.
For example, when enabling domMods.ahrefs, all links that reference your subdomain will reference your subdirectory. This all happens lightning fast and before the page gets to your visitors browser ensuring visitors and search engines are truly navigating a subdirectory.
Here are my suggested settings for Ghost:
Any time you make a change to the wrangler.toml file you'll need to rerun that deploy command.
That's How to Serve Your Ghost Blog as a Subdirectory!
I hope you got it working. If you are running into an issue, please reach out and I'll see what I can do.
How this Differs from the Nginx Solution
You may have come across a solution that involves modifying nginx config on your Ghost blog server.
That may be good solution if you are self hosting Ghost. When you have your own Ghost install, you can modify things at the server level, hence updating the nginx config.
If you do run Ghost on your own server, you may be wondering if you should use Slashblog (this solution) or the nginx reverse proxy...
Before I explain, let me clarify one thing: I have not personally tried the nginx route, so I'm not 100% on the following.
It would seem that the nginx routes handles serving your subdomain as a subdirectory, however, it seems to not handle updating the HTML to truly make it a subdirectory. So things like your links and canonical tags will continue pointing to the subdomain causing SEO issues.
Again, I may be wrong about it so if you want to give it a whirl and report back to me, I'd love to hear.
Slashblog does not require editing anything on Ghost, dealing with IP addresses, doing a host forward, running server commands like sudo systemctl, or manually modifying heders like proxy_set_header x. It only involves you changing out values in a config file to match your domains and pushing it to Cloudflare with one command.
In summary, using the Nginx solution is only viable if you are self hosting. The reverse proxy happens at the server level whereas Slashblog works at the Cloudflare edge and is compatible with both self hosted and Ghost Pro (cloud).
👉 Purchase Slashblog. 👈